Headless Raspberry Pi Installation for Beginners
date
Jun 14, 2023
thumbnail
slug
headless-raspberry-pi-installation-for-beginners
author
Can Durmus
status
Published
tags
Installation
Start Here
Raspberry Pi
summary
Headless Installation with Raspberry Pi Imager for Beginners.
type
Post
updatedAt
Jul 1, 2023 06:15 PM
It is your first time using a Raspberry Pi for a new project or the latest of many. It doesn’t matter, you need to install it properly for reliable operation and easy development. Of course, this is yet another installation guide for Raspberry Pi but here is the difference: I am going to make an installation using the Raspberry Pi Imager interface and the headless installation process will be highly painless. The installation will be completed in nine steps and there are three optional but highly recommended steps to make development and testing easier.
The Raspberry Pi hardware version is not very important for this guide but wireless connectivity is a must-have since we are establishing our connection through a wireless network.
What is headless installation?
Headless installation means that you will not need to use a monitor, keyboard, or mouse while getting your Raspberry Pi up and running. This installation approach is particularly convenient if you are starting Raspberry Pi-based projects daily (to finish eventually or abandon in the middle…) because the process goes a lot faster than changing settings on a Raspberry Pi connected to a monitor, travelling across the settings. Lastly of course there is a lot less required hardware than the normal installation.
Hardware Requirements
- Raspberry Pi (of course)
- Micro SD Card (8 GB at least)
- Power Adapter (Original preferred)
Software Versions Used in This Guide
- Raspberry Pi Imager - v1.6
- Raspberry Pi OS - Release: 2021–03–04
- Angry IP Scanner - 3.7.6
- pyenv - 1.2.24
1) Download Raspberry Pi Imager
Our best friend in this guide is Raspberry Pi Imager which is the official tool published by Raspberry Pi Foundation. It is a lot more powerful tool than it seems. You can download it from this link.
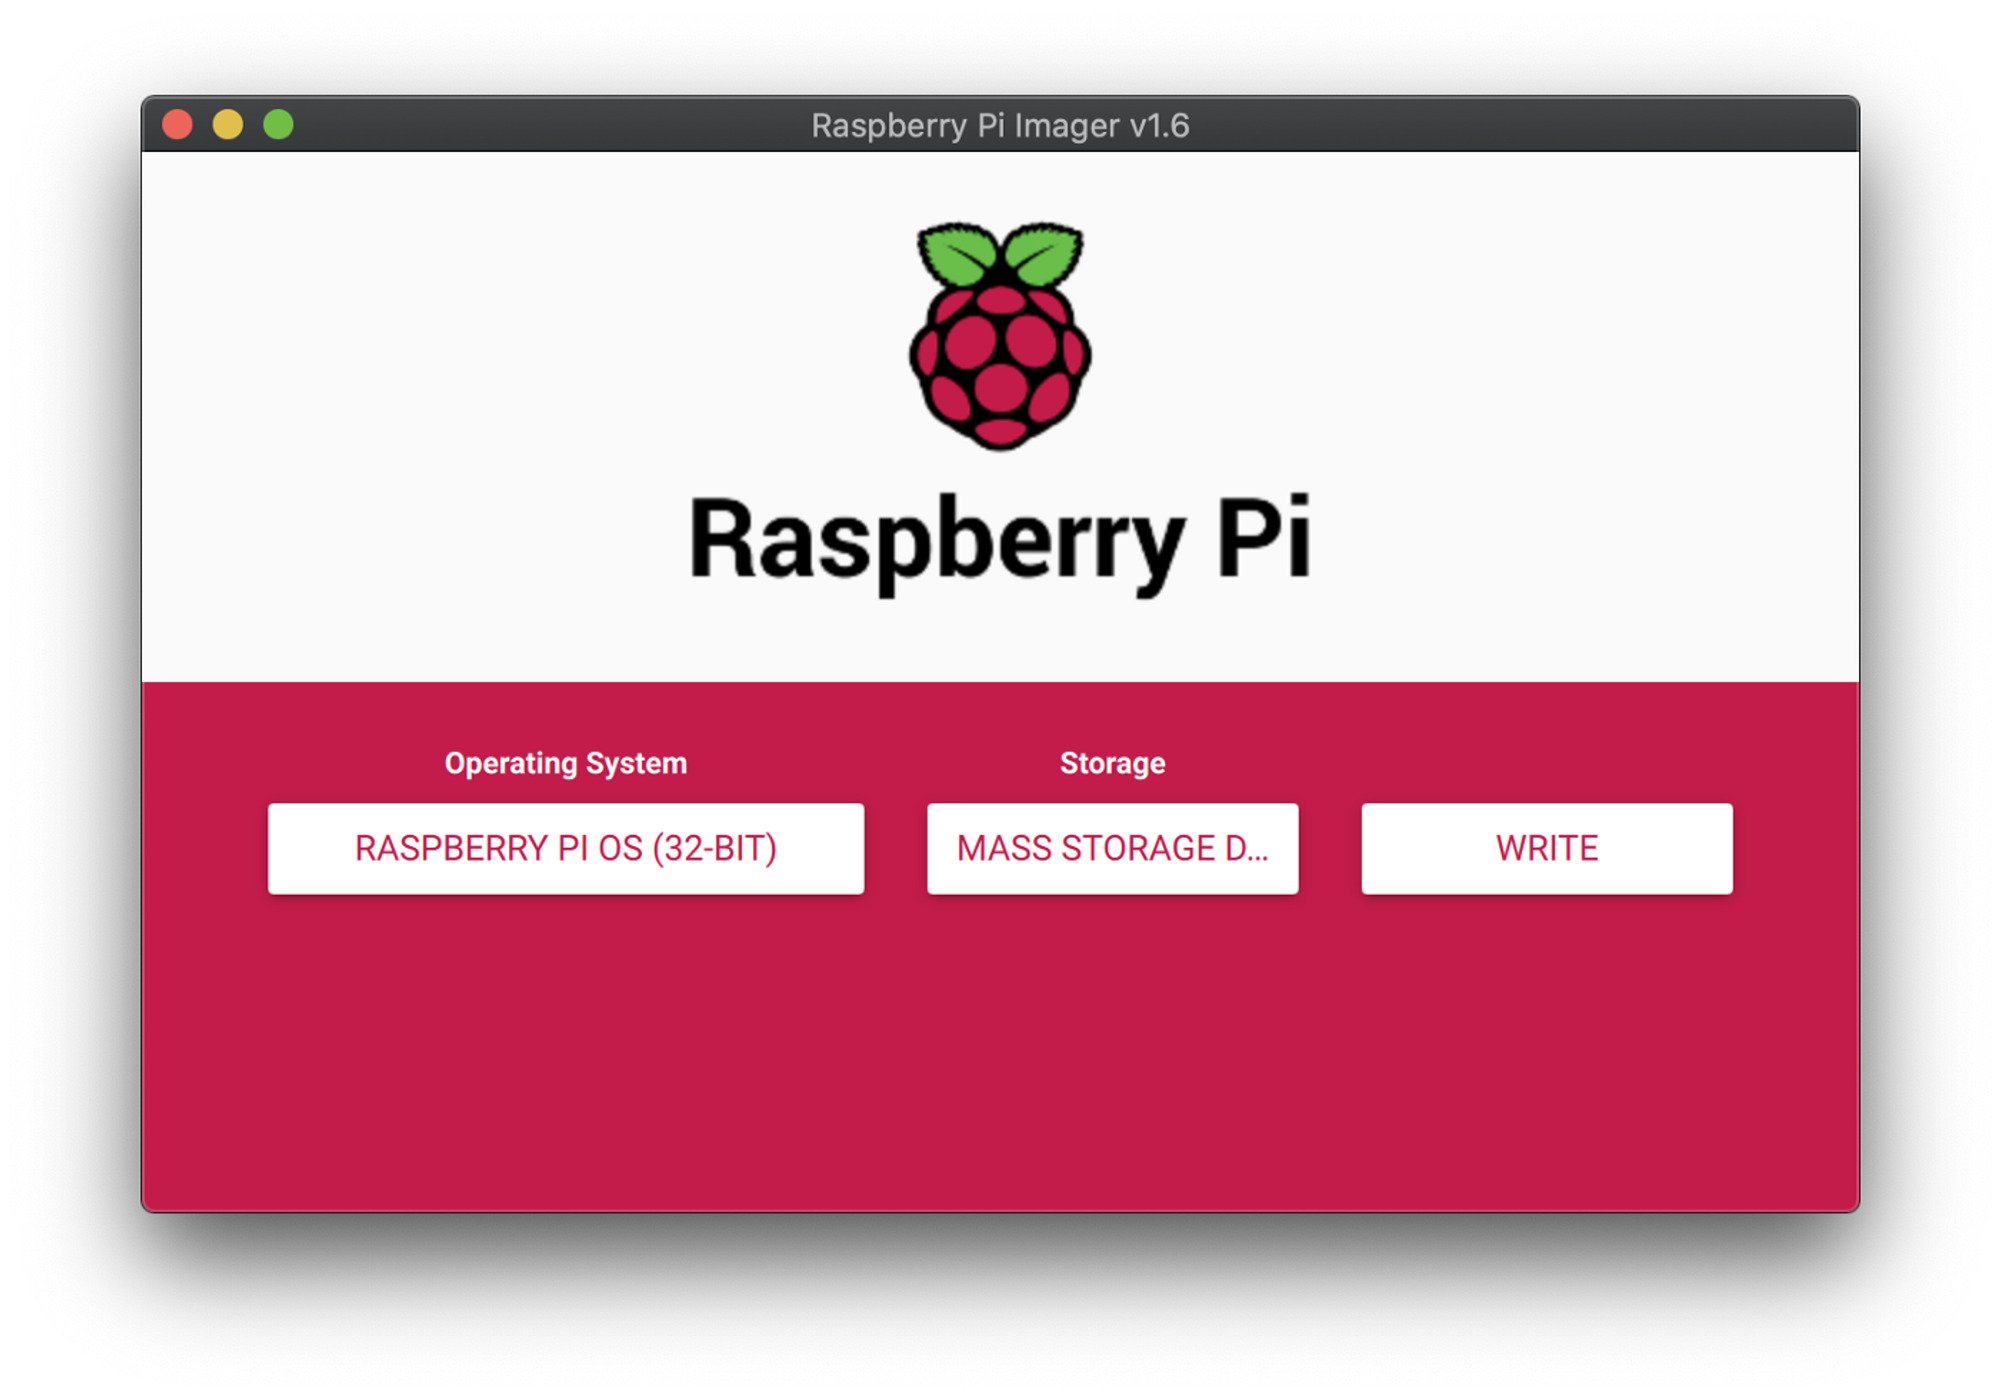
2) Main Screen
The tool is extremely simple, we choose our preferred operating system, Micro SD Card, and start writing. Before starting we will be making a couple of customizations for our installation.
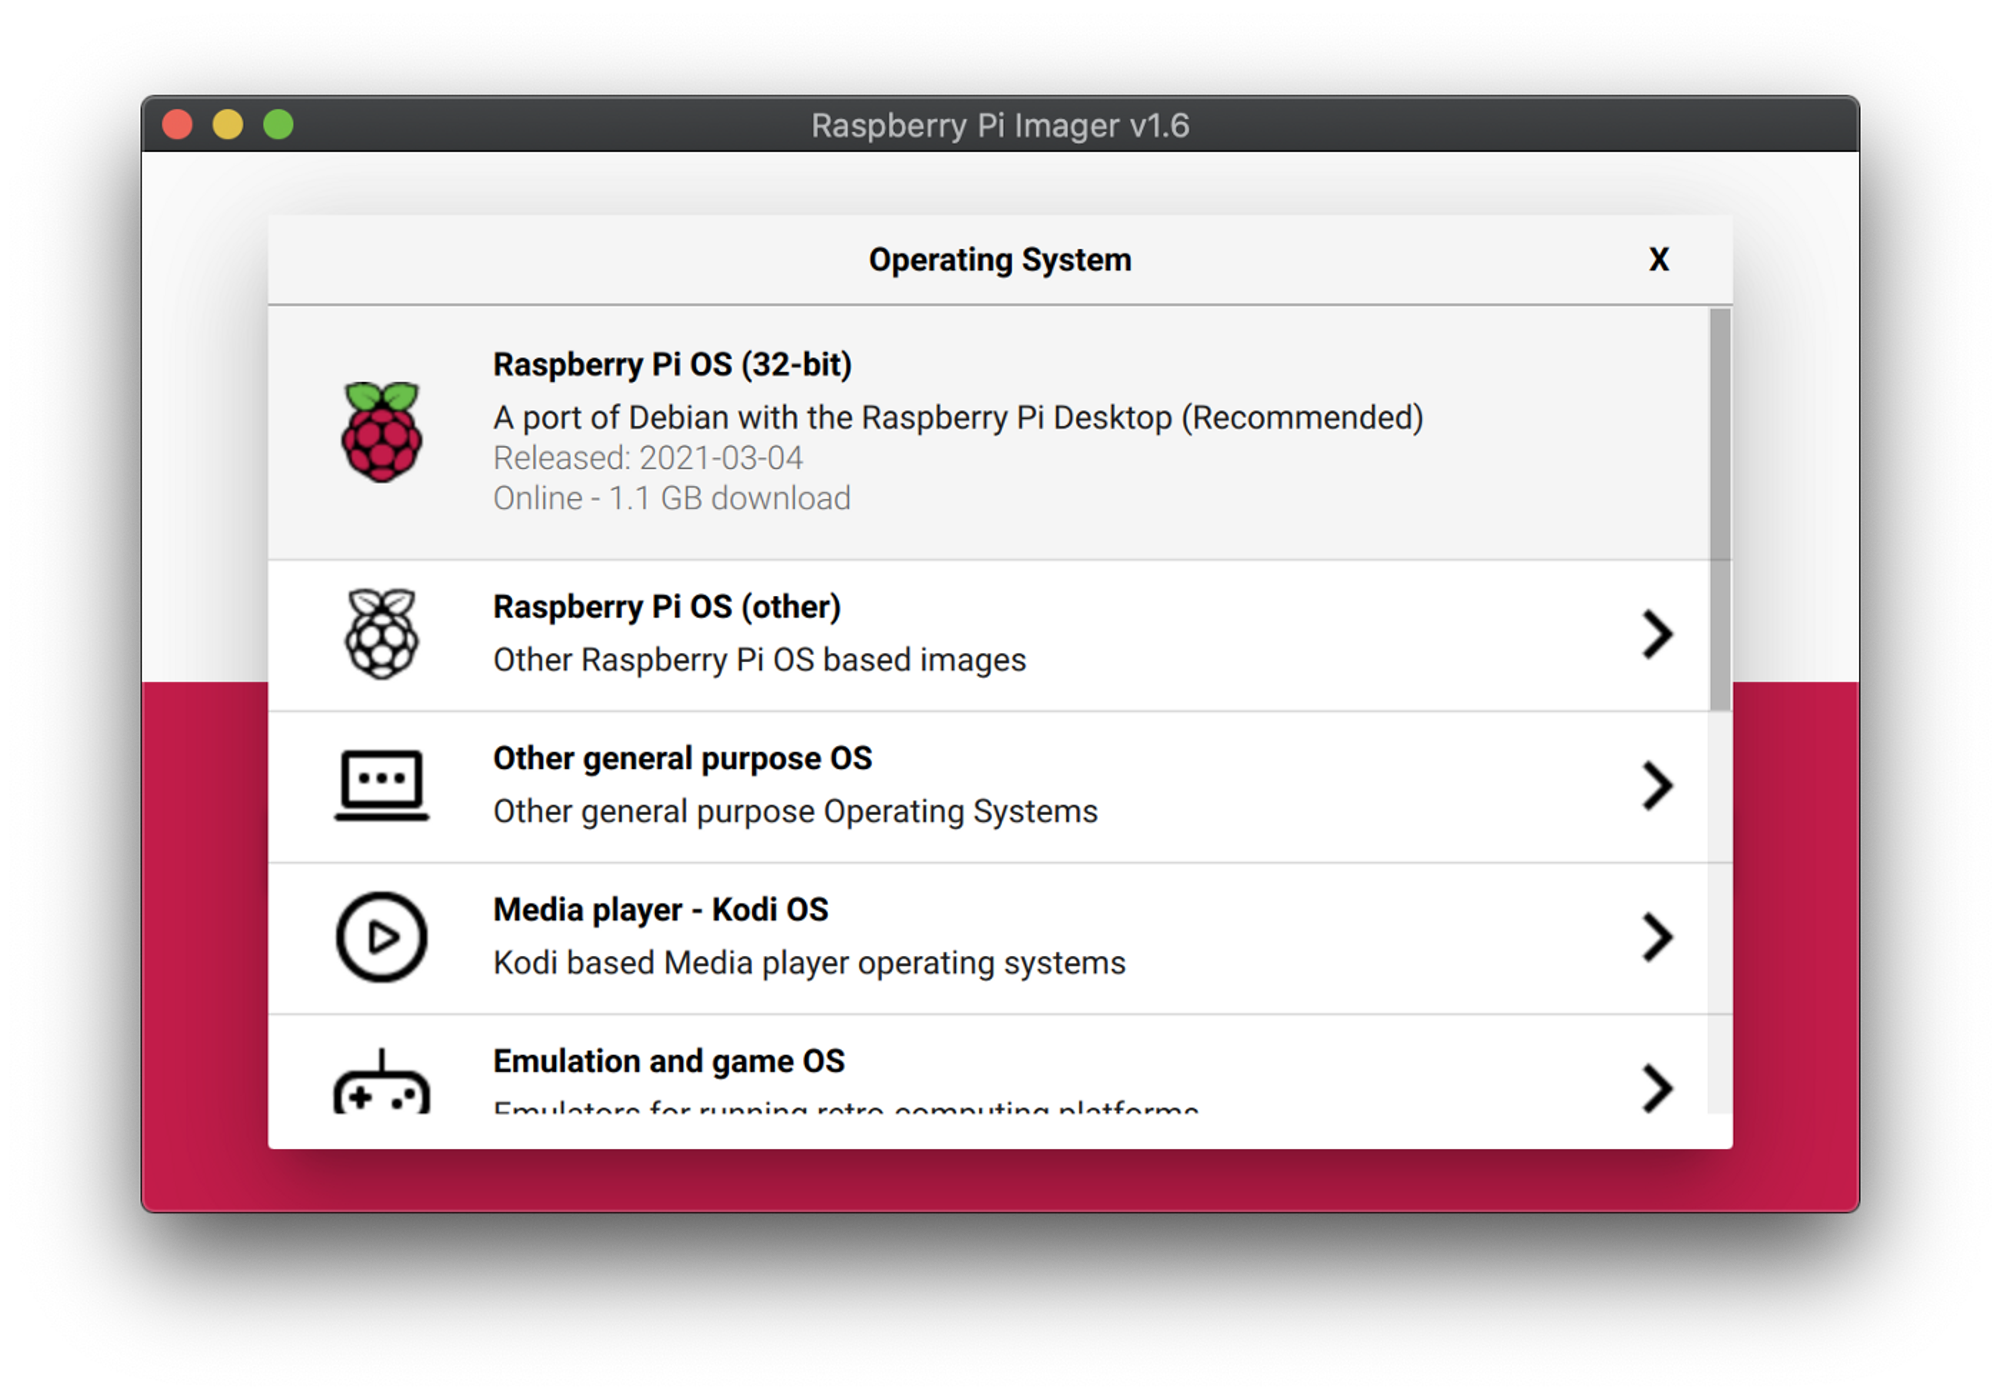
3) Select Your OS
Raspberry Pi OS (32-bit) is the main operating system for general Raspberry Pi usage, if you prefer you can select other operating systems from the menu or flash your custom operating system by choosing ‘Use custom’
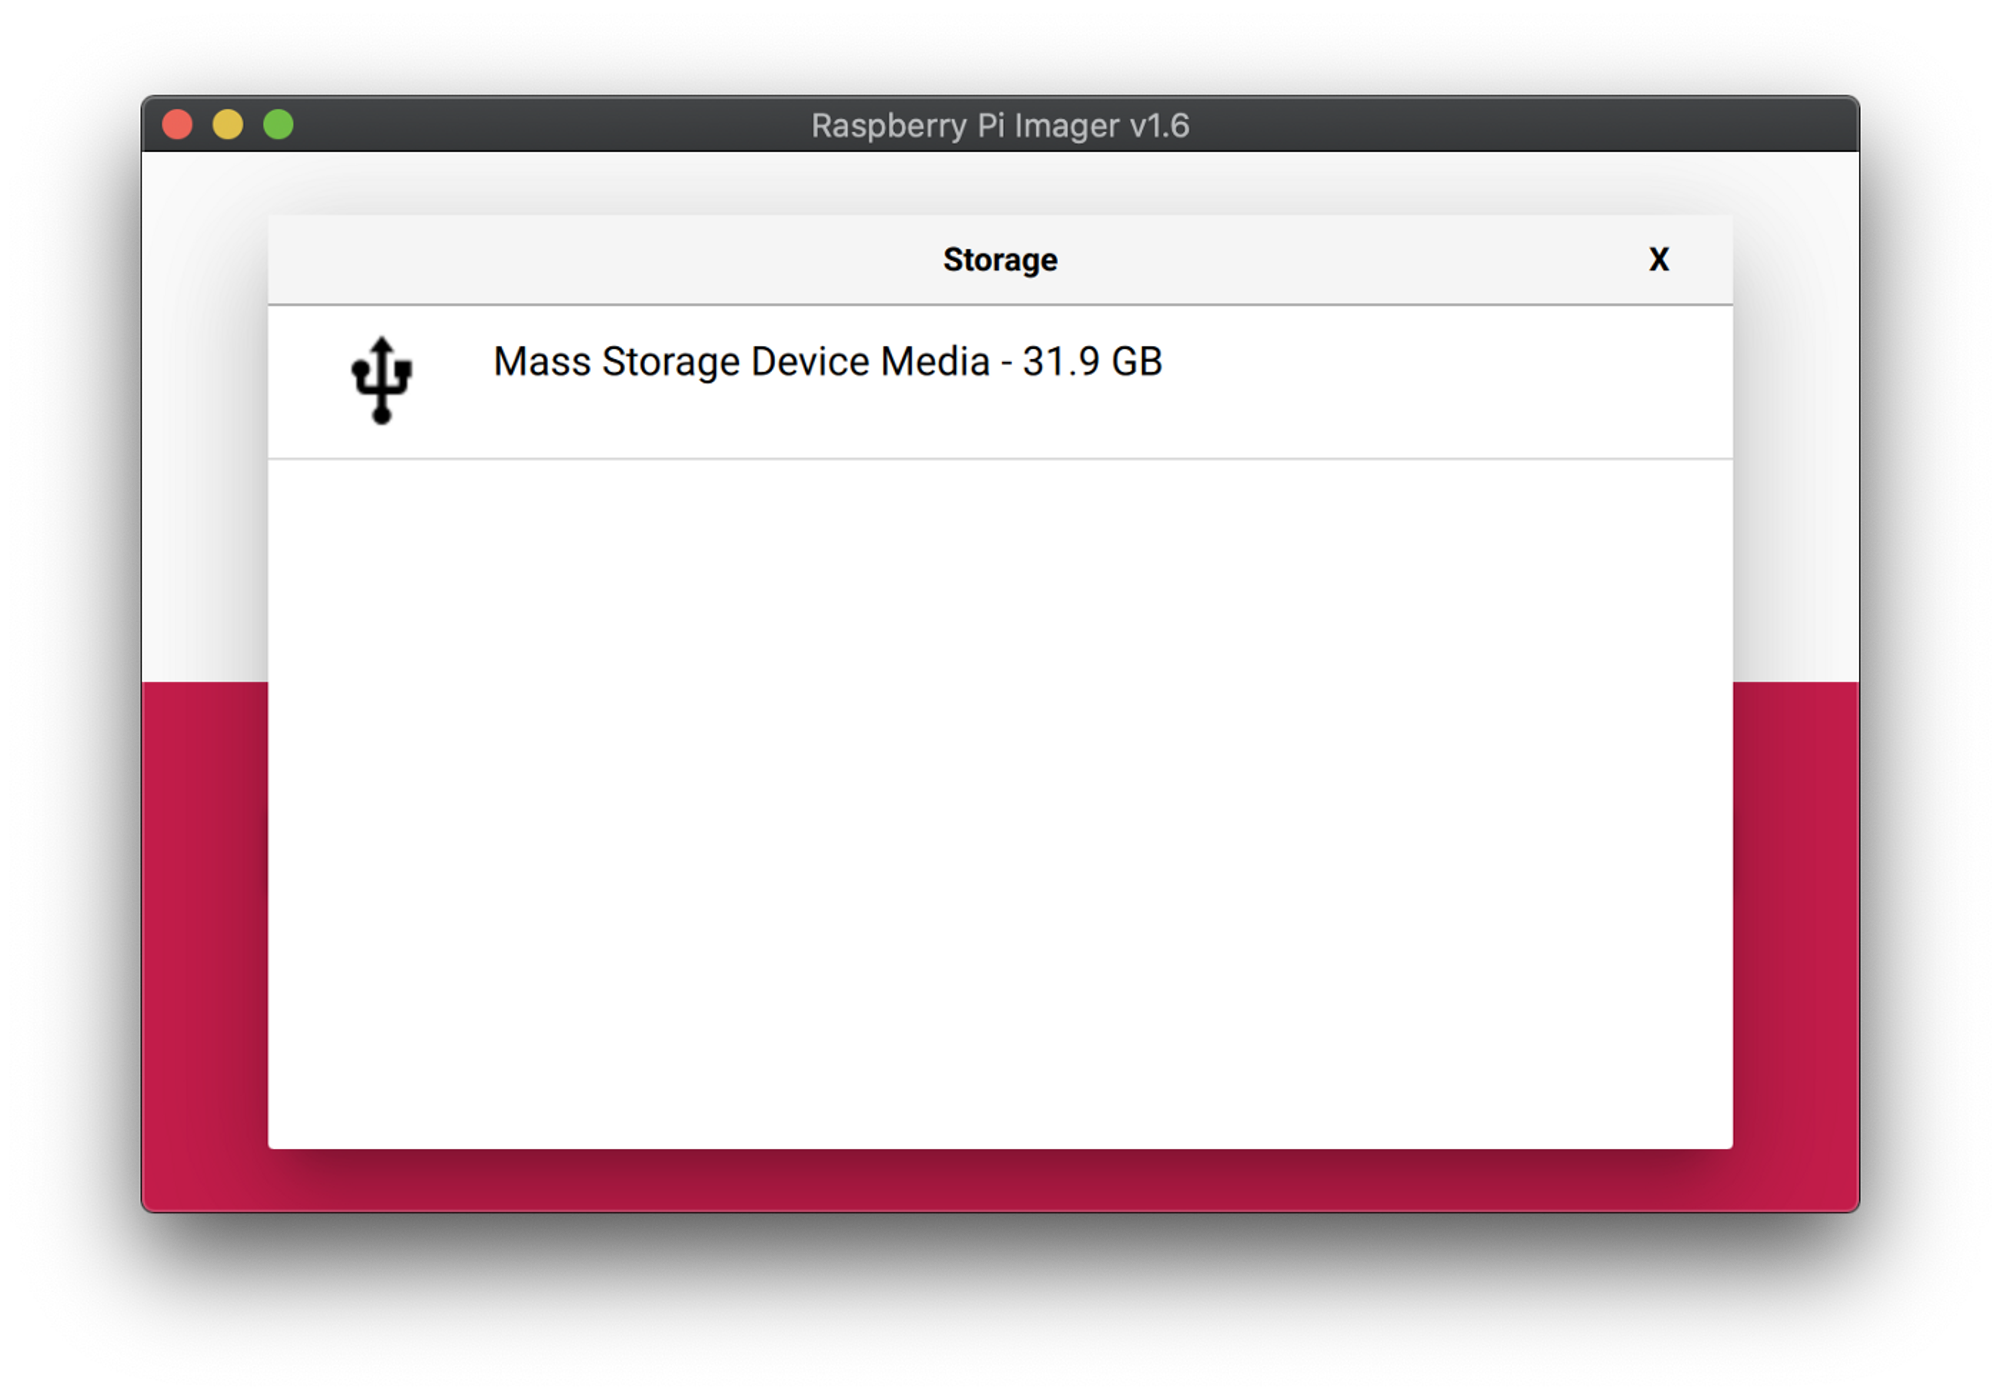
4) Select Disk
After choosing the operating system, we have to choose the Micro SD Card to write OS.
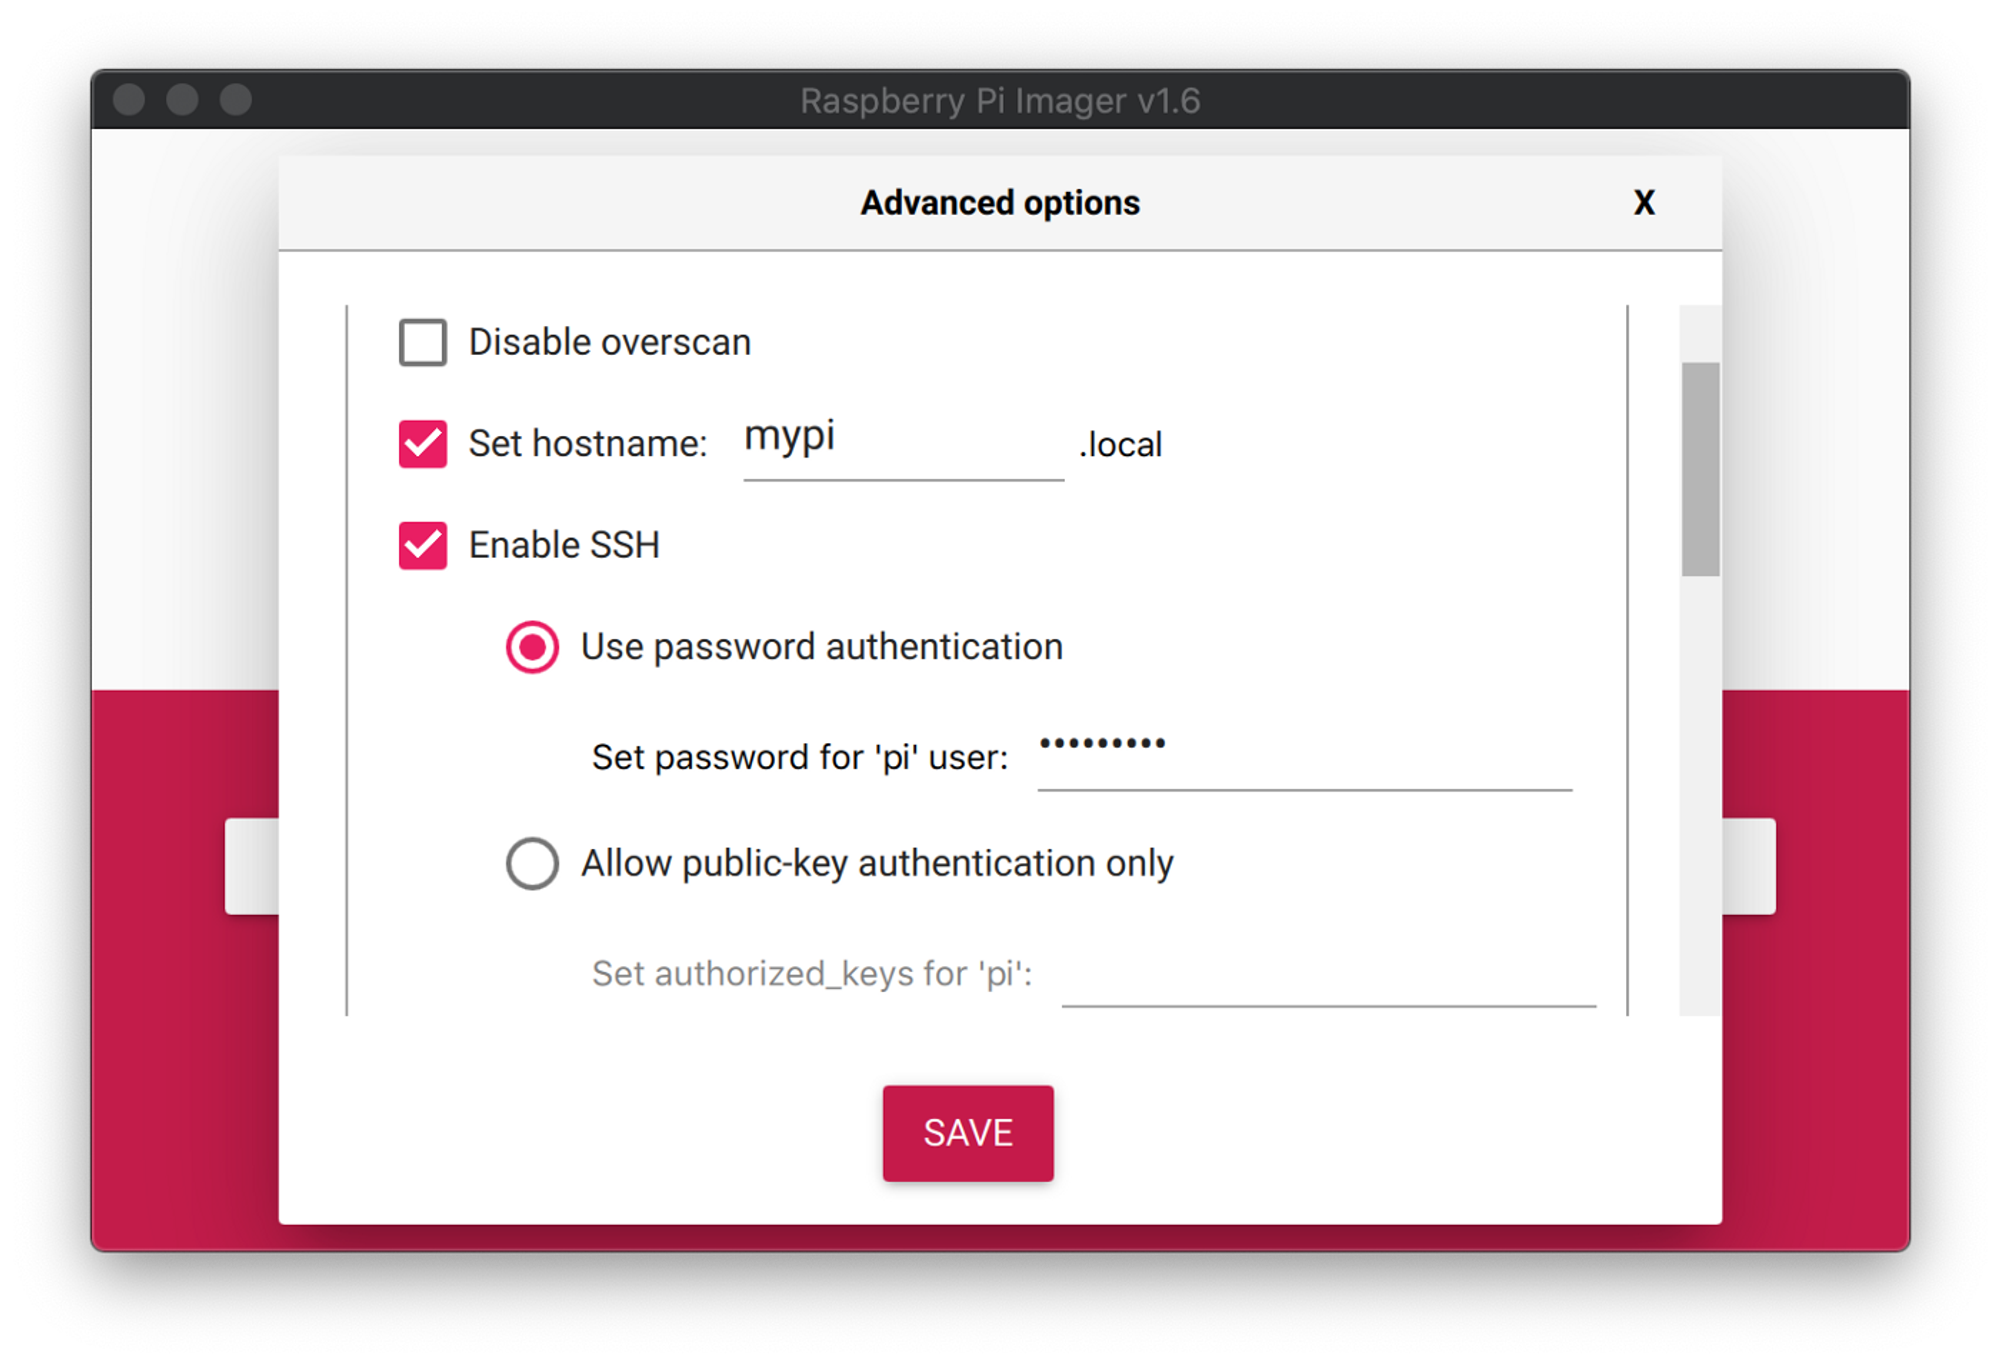
5) Set Hostname & Enable SSH
Press cmd+shift+X (ctrl+shift+X for Linux and Windows) and voila, all of the customizations that needed to be done for a headless installation are here in the “Advanced Options” menu. The first part to set is “Hostname”. A hostname is a label of the device in a network to prevent making the user remember the IP address of a device. SSH is “Secure Shell” and enabling it will make us able to access it through the network without haven to interact with the Raspberry Pi with a keyboard or monitor. Setting a strong password for the ‘pi’ user is important to prevent unauthorized access to your Raspberry Pi.
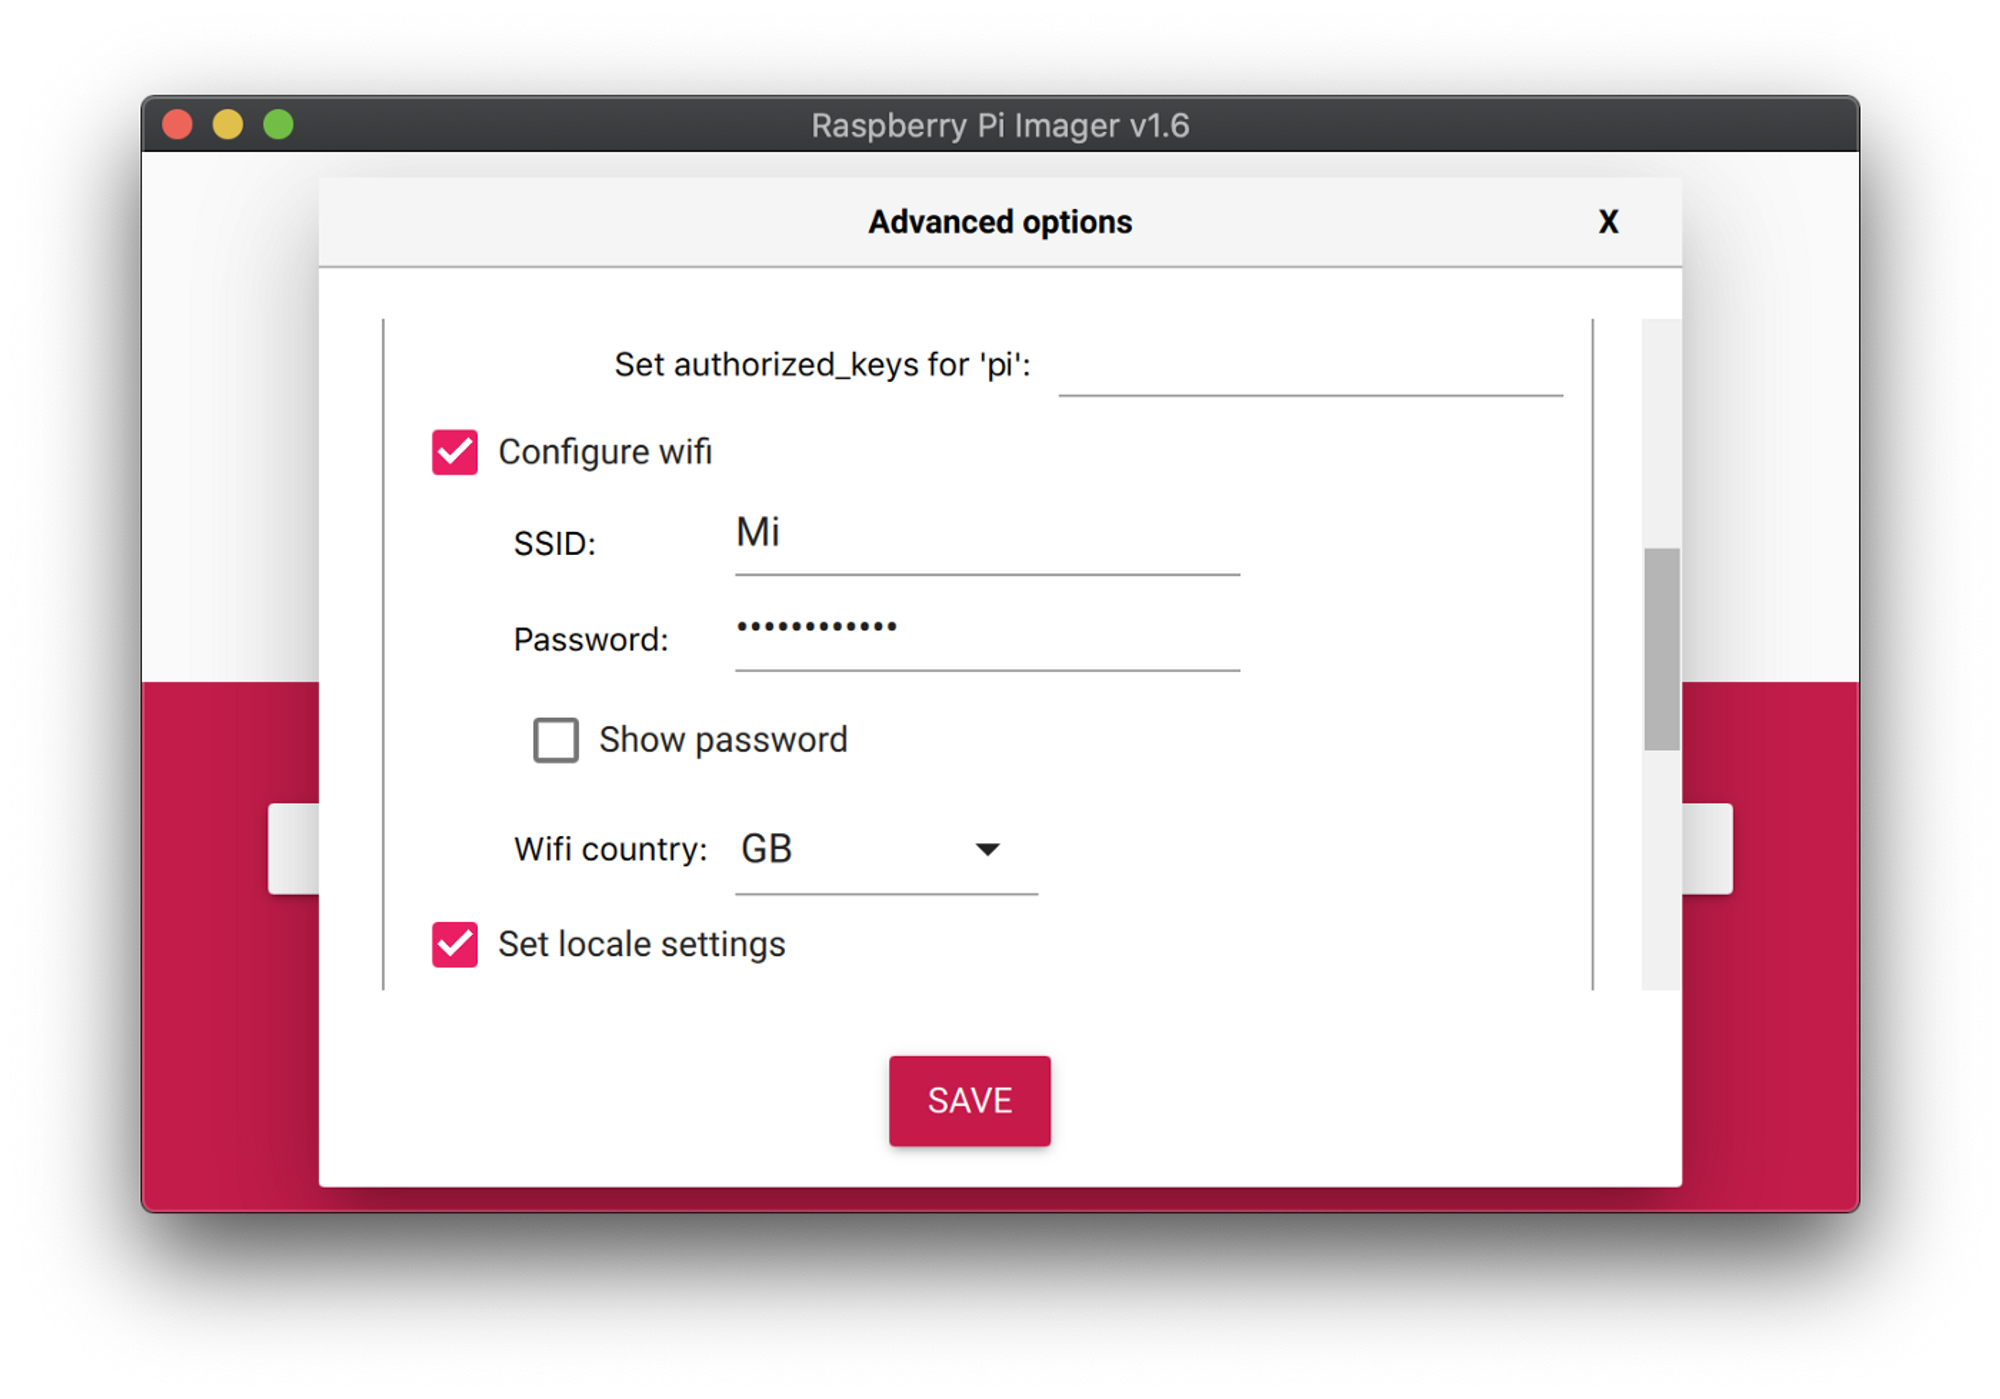
6) Configure Wi-Fi
This step will make the Raspberry Pi able to connect to our local wireless network automatically beginning from the first boot. SSID is the name of the wireless network and the Password is of course the password of the wireless network. Setting ‘Wifi country’ correctly is important to make Raspberry Pi use the proper frequencies for the countries.
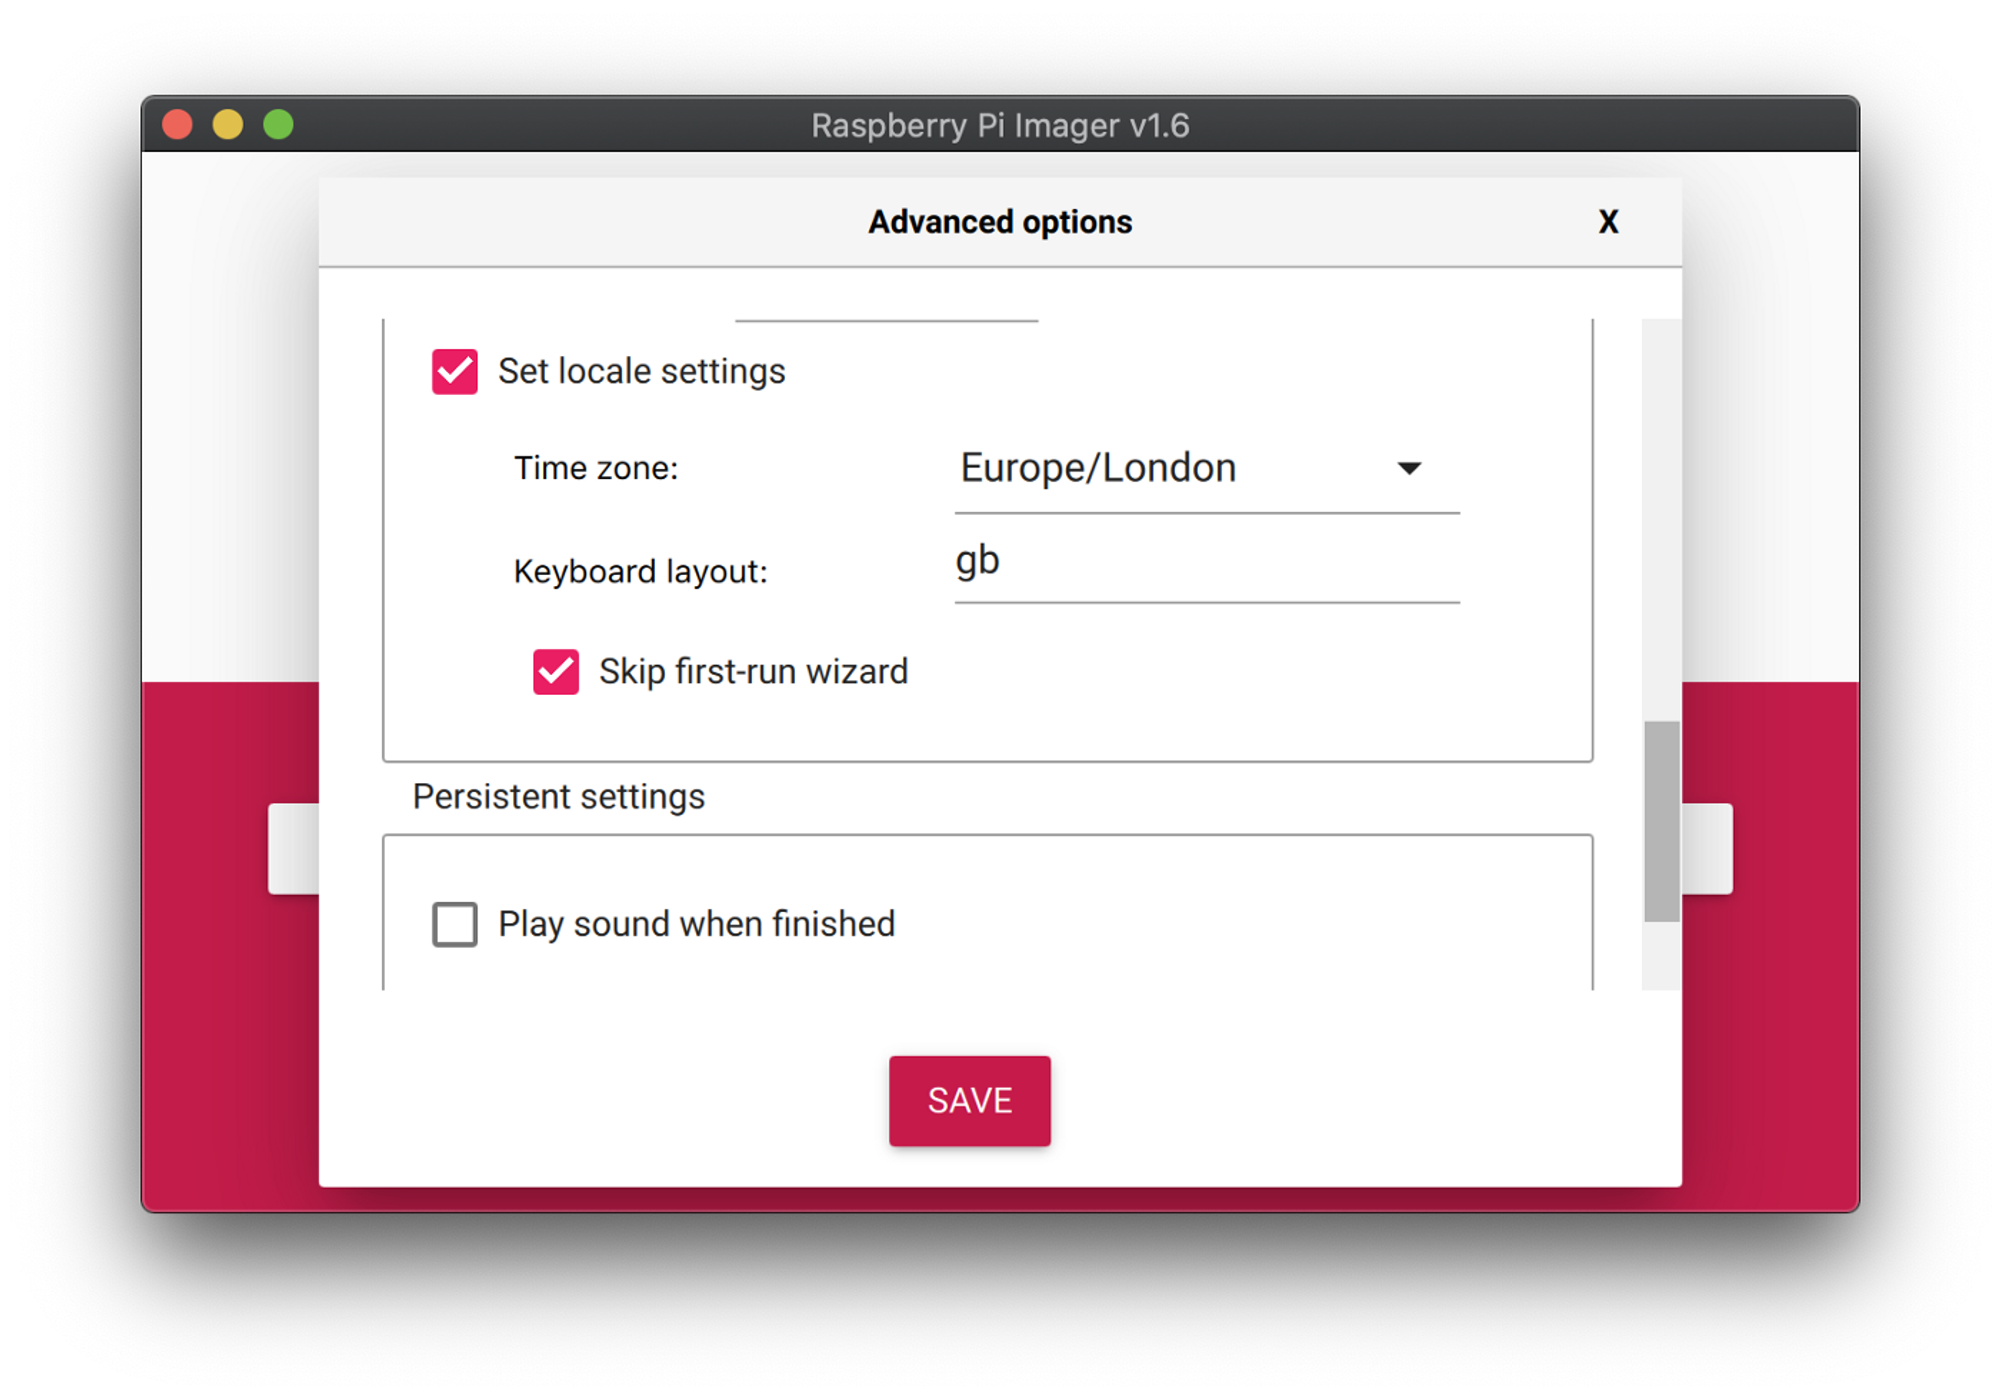
7) Set Locale
Making locale settings properly allows Raspberry Pi to have a proper time zone which means less frustration caused by wrong timing on automated emails or Cron-Jobs. For the keyboard layout, you have to choose the keyboard layout for the connected keyboards through the USB ports, it will not affect the terminal SSH sessions. Skipping the first-run wizard will not affect us very much because we will not be using the desktop environment but I am checking it anyways.
8) Confirming and Writing
After making the customizations on the settings we are ready to go, click ‘Save’ and press ‘Write’. The Imager will ask for permission to access the selected disk and it will wipe all data on the selected disk so being extra careful is beneficial.
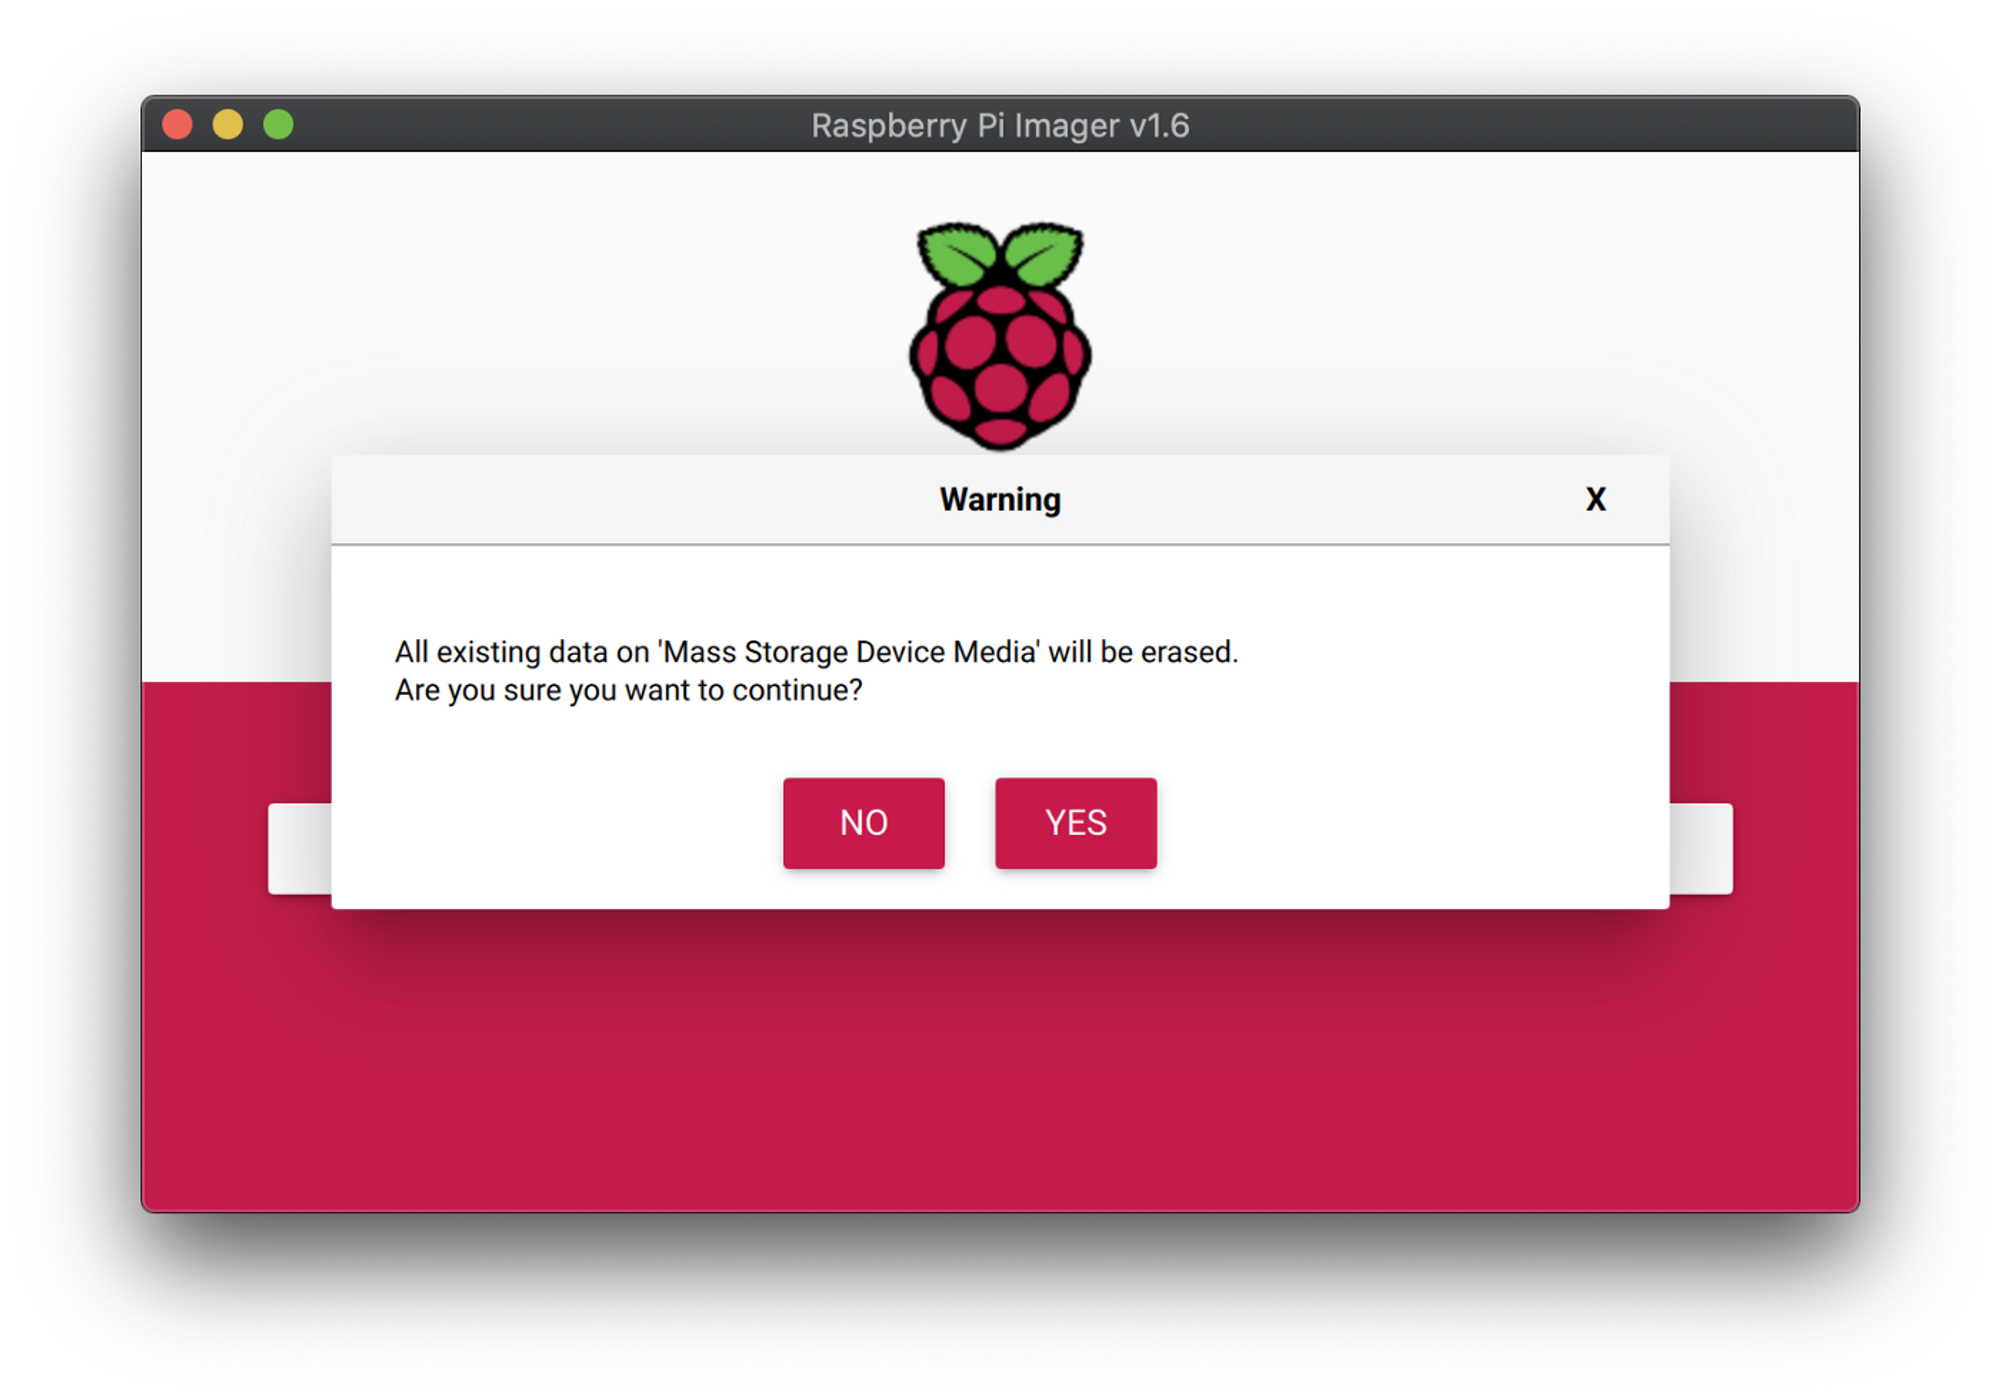
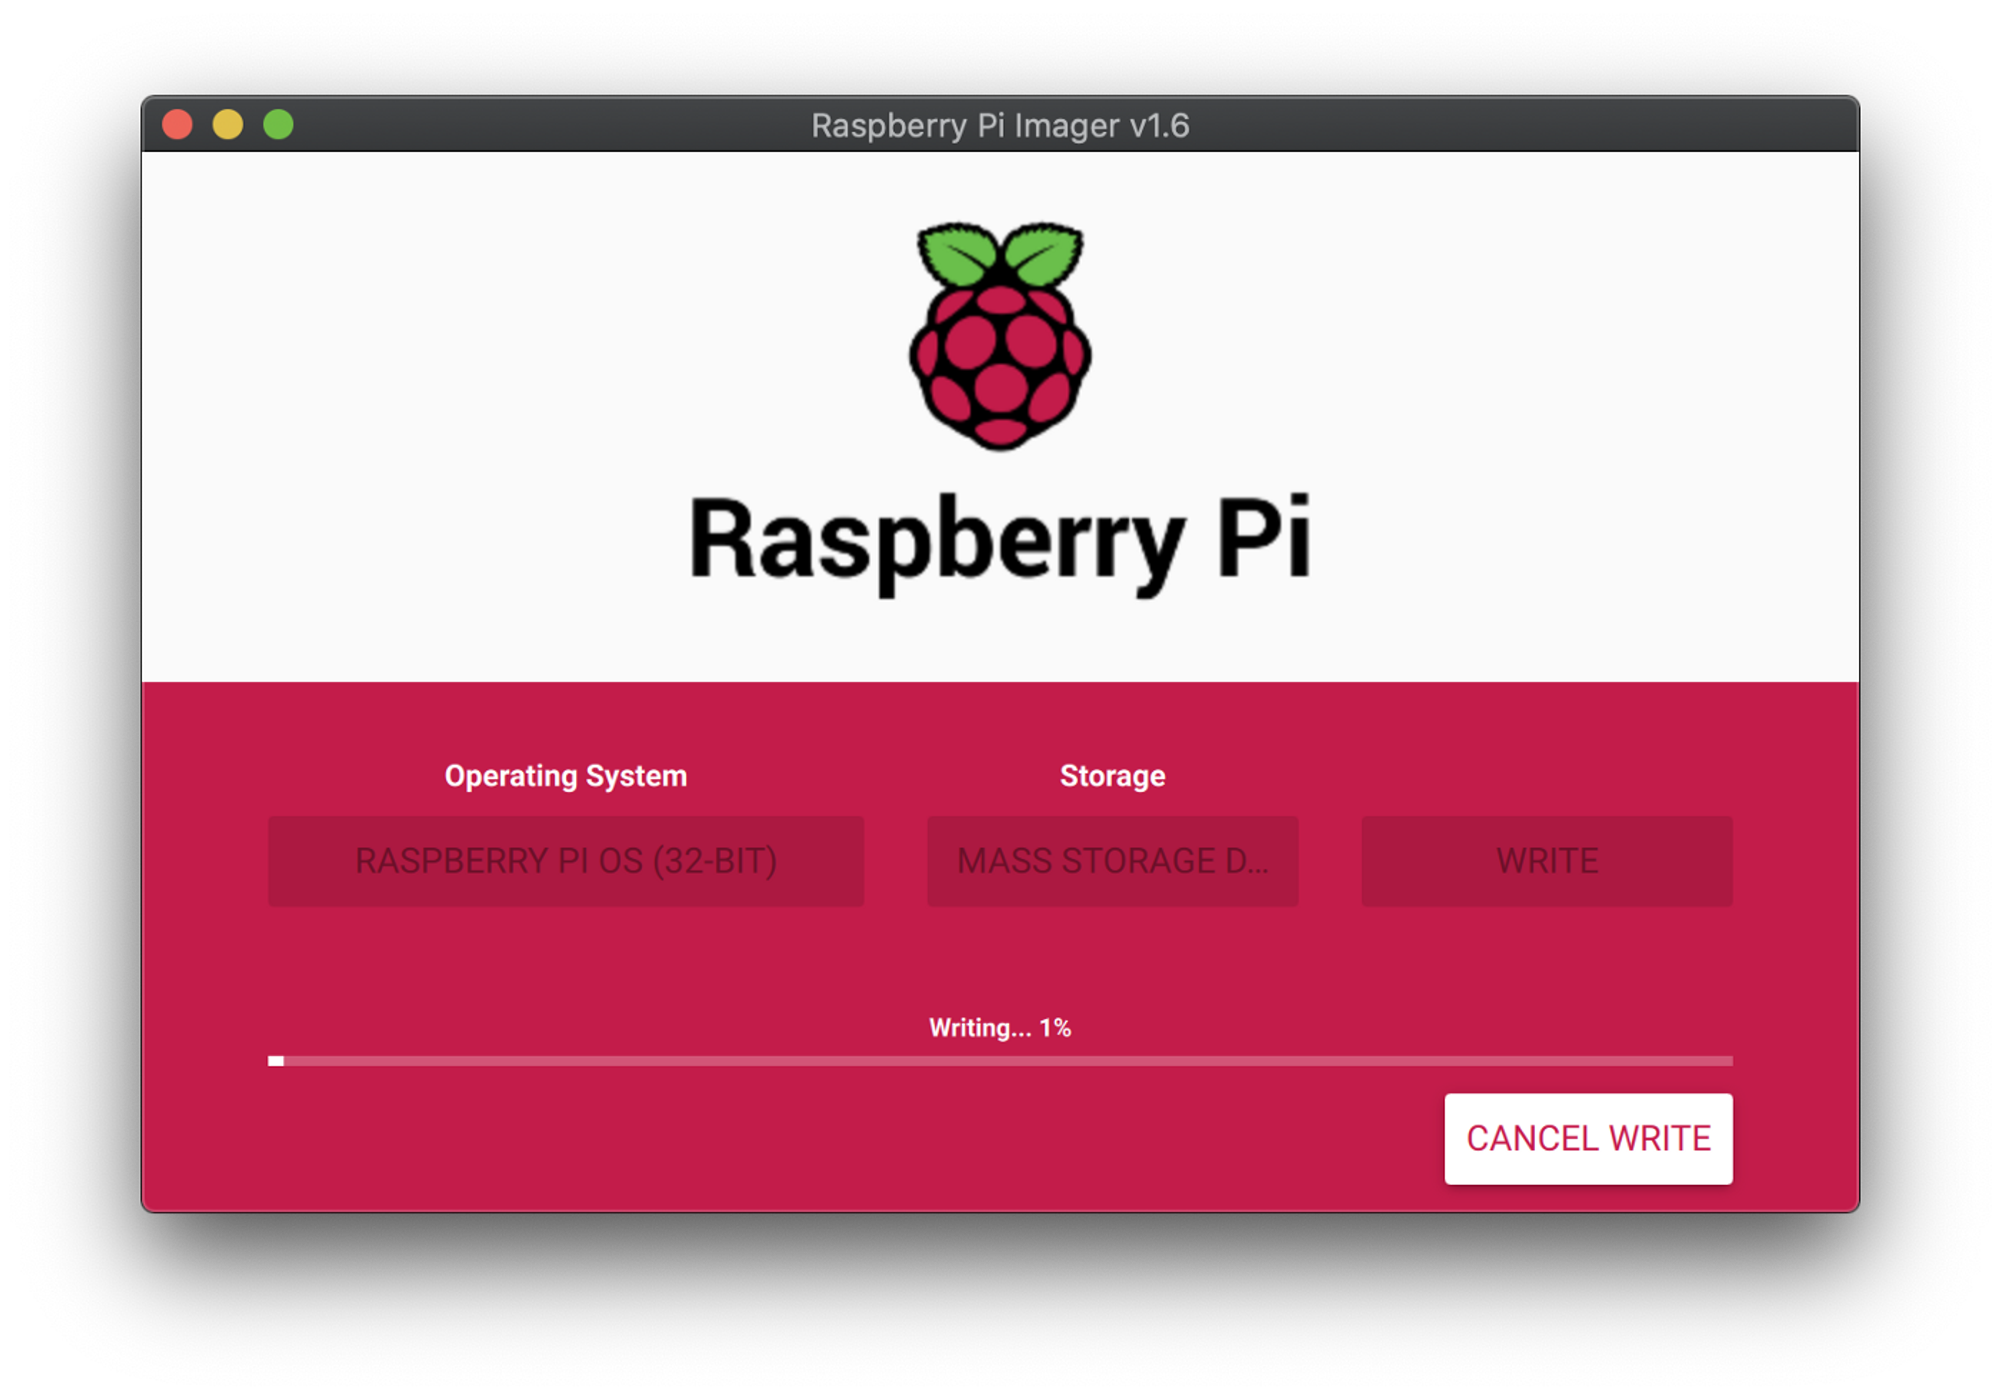
After the confirmation, all you need to do is wait.
9) The First Login
All right we prepared our Micro SD card. Insert it into the Raspberry Pi and connect it to power. After about one minute (may vary by the SD card speed) it will be connected to the local wireless network. There are many ways to reach our Raspberry Pi, the first one is to connect it with its hostname. In this case, my Raspberry Pi’s hostname is ‘mypi’.
Sometimes hostname won’t work for a couple of different reasons, or sometimes we need our Raspberry Pi’s IP address for some other reason. Angry IP Scanner is my favourite network scan tool for this job. After you download and install Angry IP Scanner, open it and click ‘Start’. It will automatically check all IPs between the network IP range. Here is our Raspberry Pi.
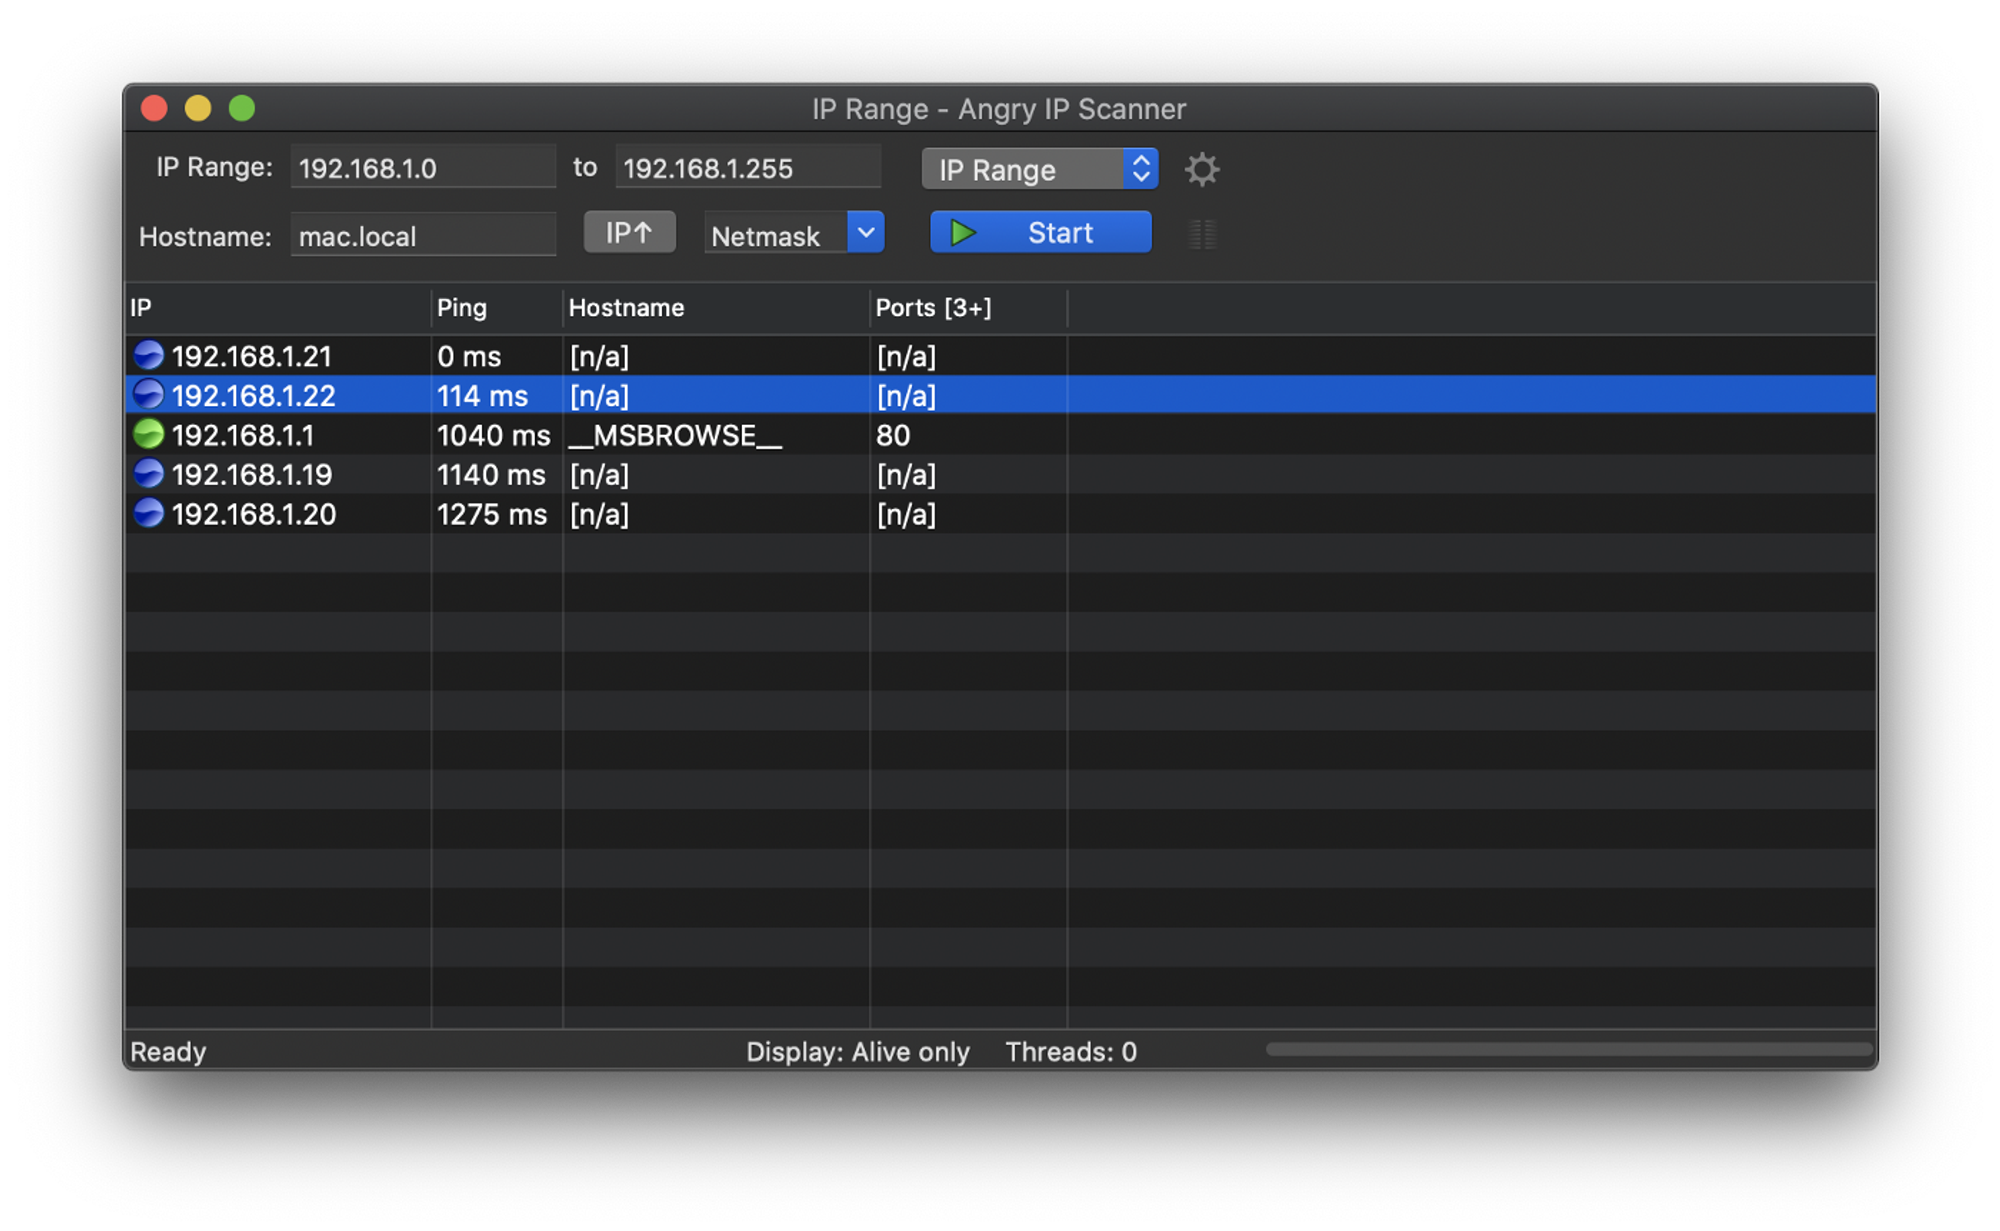
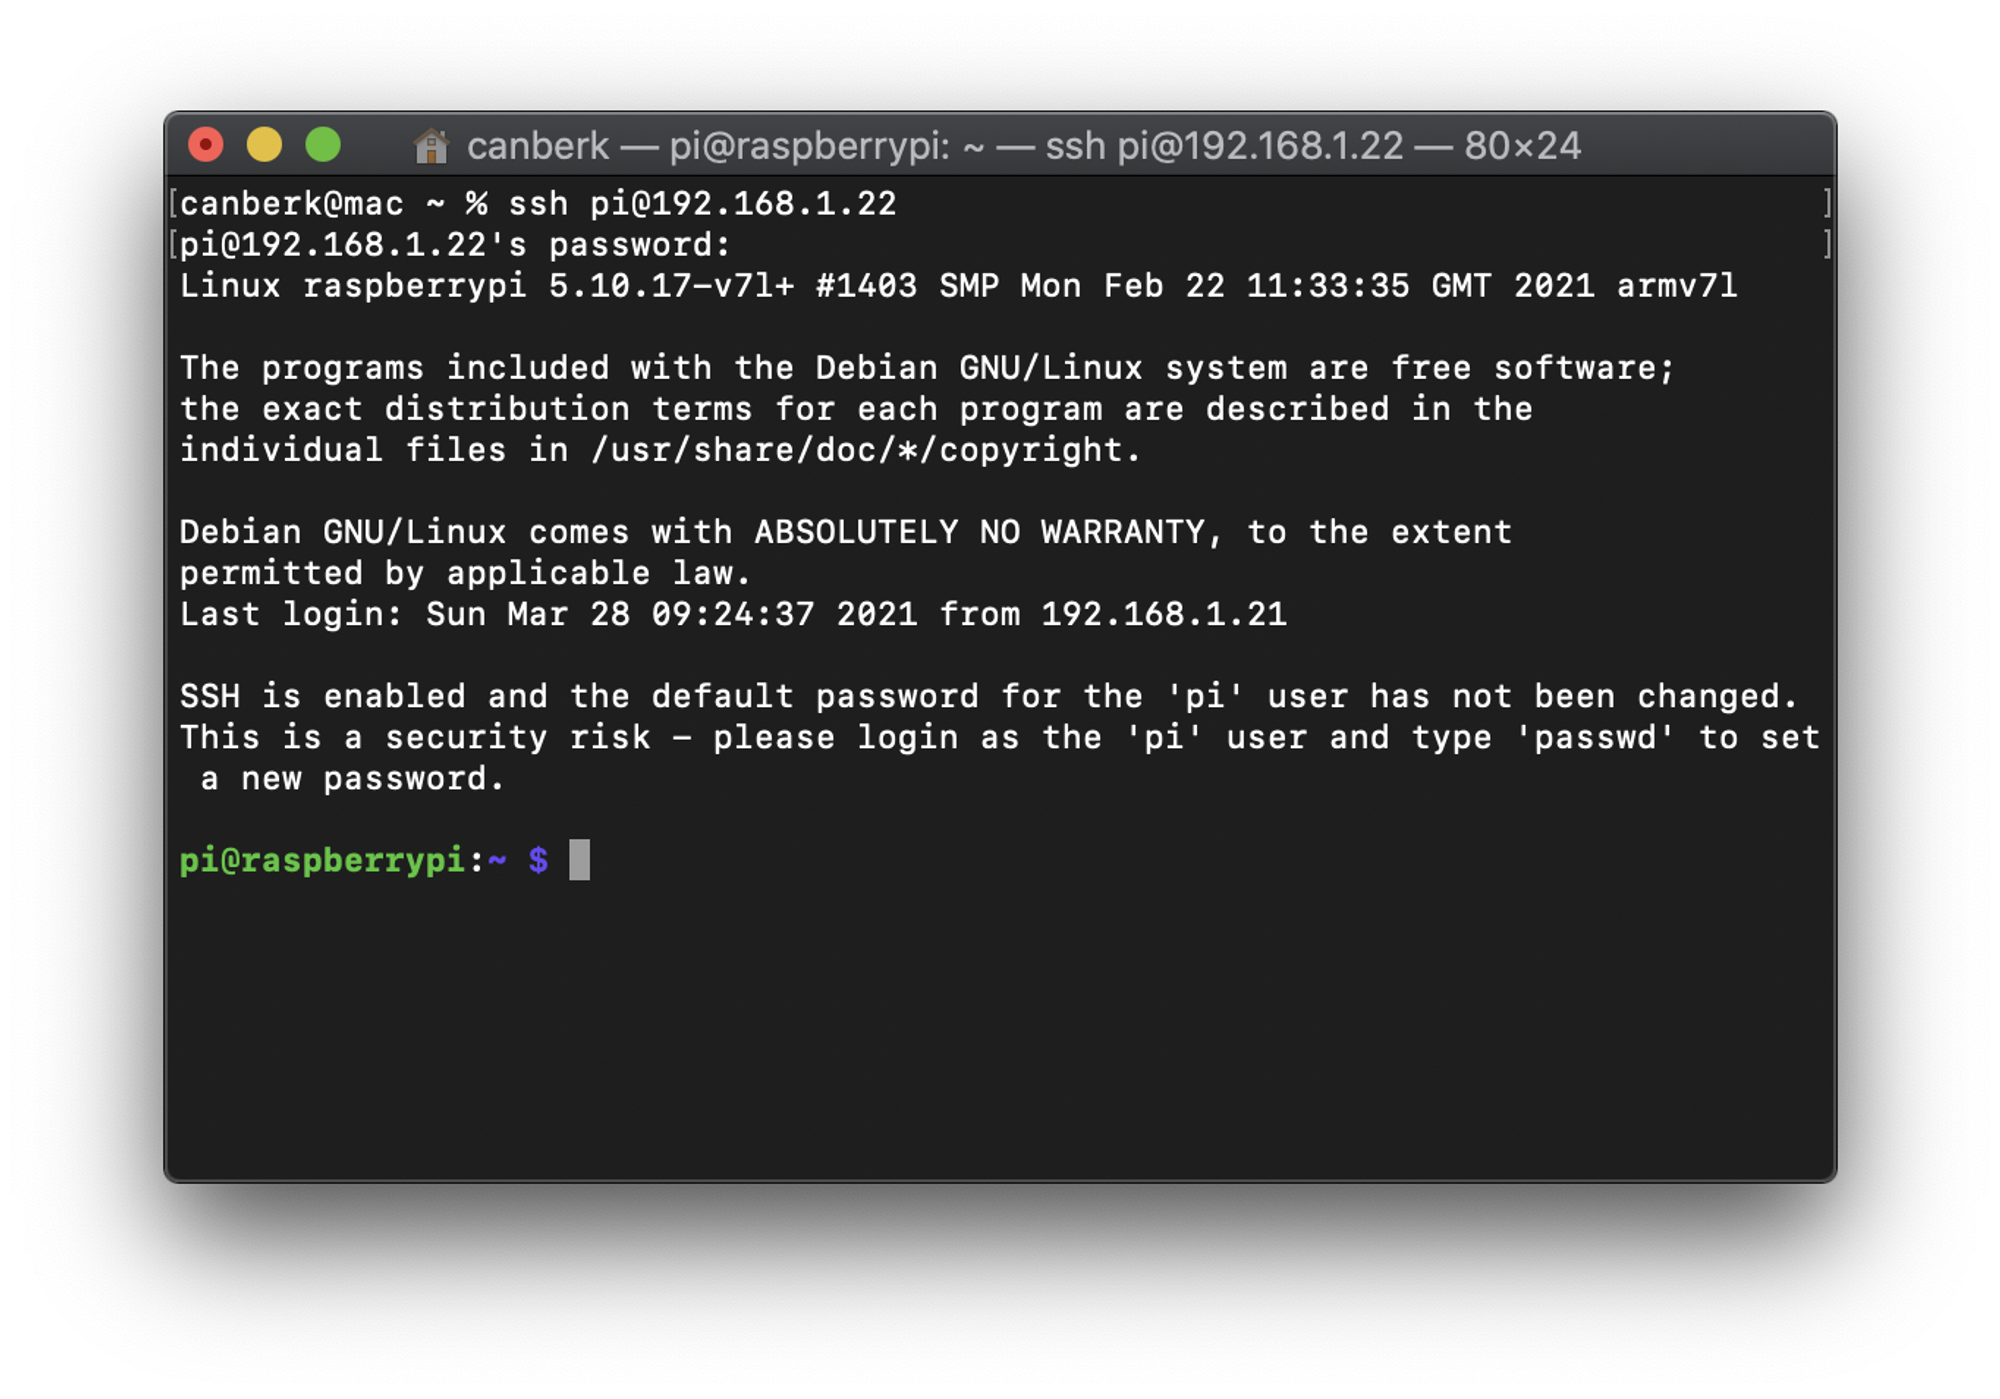
We can now connect to the Raspberry Pi with its IP address.
Enter the password that you set in Step 5 and you are connected to the Raspberry Pi.
10) Change the Default Password
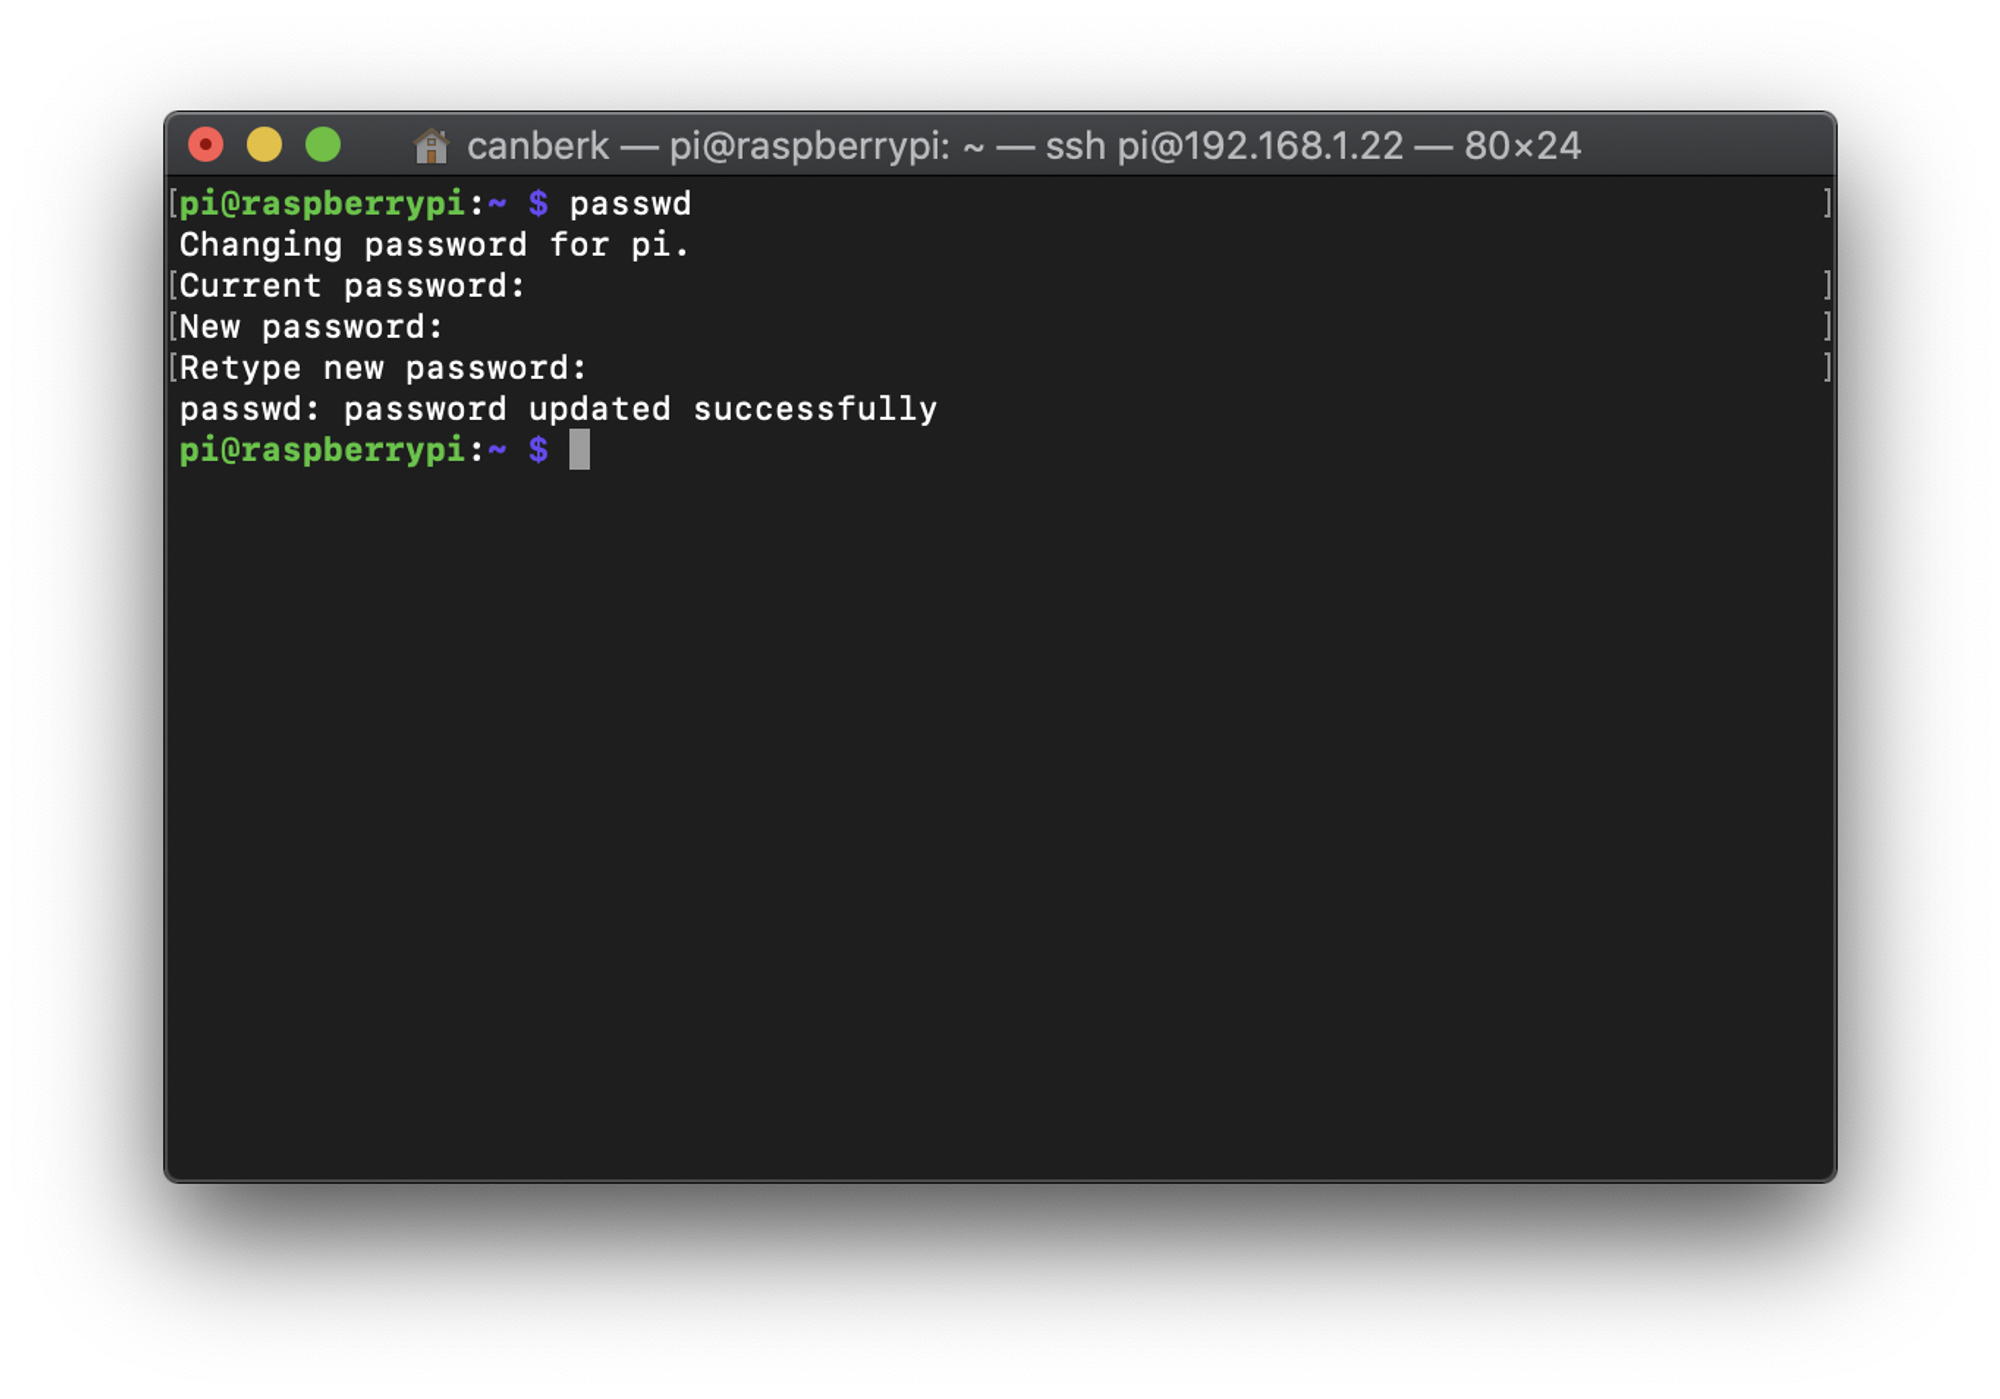
If you are using ‘raspberry’ as ‘pi’ user password (it is the default password for Raspberry Pi) there will be a warning that you will see every login and keeping it this way is not secure. We can change the ‘pi’ user password with a simple command.
passwd
11) Enable Passwordless Login
Entering the password every time you try to log in can be frustrating sometimes, we have a solution for it. In a new terminal that is not connected to the Raspberry Pi, generate an SSH key with the command below.
ssh-keygen -t rsa
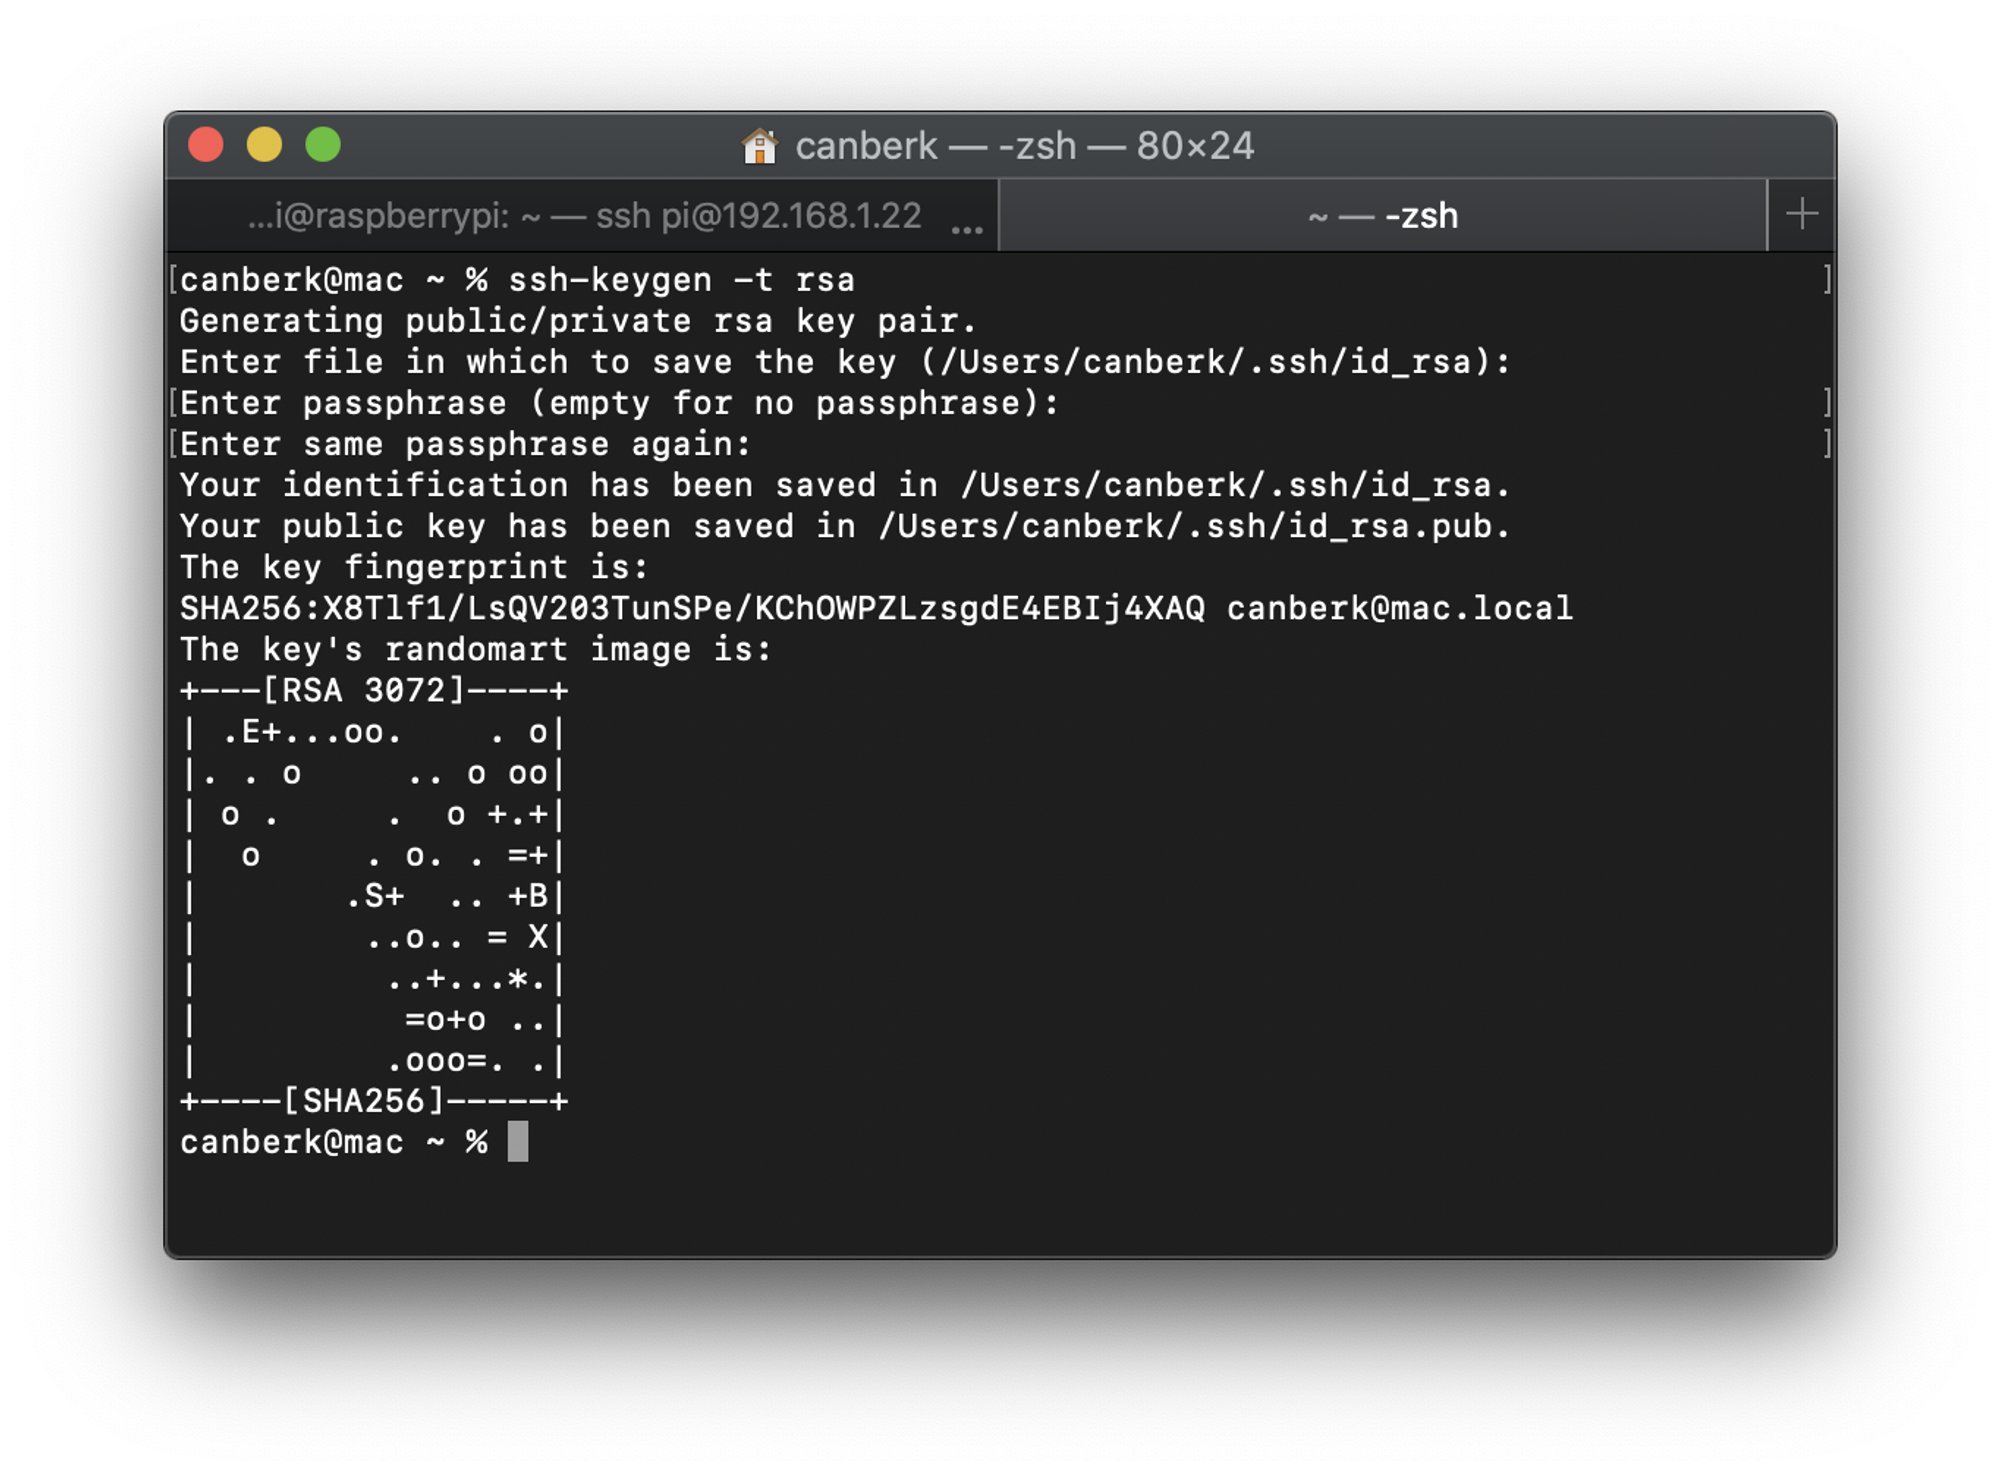
After entering the command you can leave the filename default and you don’t have to enter a passphrase. SSH key will be generated under your home directory ‘.ssh’ folder. Now we need to place it into the Raspberry Pi. First, we must create a ‘.ssh’ folder in Raspberry Pi’s home directory. Do not forget to replace IP addresses from commands with your Raspberry Pi’s IP address.
ssh [email protected]
mkdir -p .ssh
After that, we can send the public key to the Raspberry Pi.
cat .ssh/id_rsa.pub | ssh [email protected] 'cat >> .ssh/authorized_keys'
Now we should be able to log in to our Raspberry Pi with SSH without needing to enter a password. Go, try it.
12) Install pyenv
If you are installing Raspberry Pi for any project, you probably will need a proper Python environment. If you are not very experienced, you will encounter some problems that will push you to install the OS from ground zero and if you are very experienced you will know that you will need a Python environment management utility. ‘pyenv’ is my preference, there are lots of different alternatives to it like ‘pipenv’ or ‘virtualenv’. I like it because when you install and set it up once you don’t need to activate any virtual environments. Also, you can change the default system Python interpreter easily and manage different Python versions. For the Python version, I prefer Python 3.9.4 with Raspberry Pi OS Bullseye. The first thing to do to install pyenv, installing its dependencies. Before installing the dependencies, running apt update is important.
sudo apt update
sudo apt-get install -y make build-essential libssl-dev zlib1g-dev libbz2-dev libreadline-dev libsqlite3-dev wget curl llvm libncurses5-dev libncursesw5-dev xz-utils tk-dev libffi-dev liblzma-dev
After the dependency installations, we can install it with an online shell script. You can check out the contents of the shell script here: GitHub link.
curl https://pyenv.run | bashNow we need to make the ‘pyenv’ command available systemwide.
echo 'export PATH="$HOME/.pyenv/bin:$PATH"' >>~/.bashrc
echo 'eval "$(pyenv init --path)"' >>~/.bashrc
echo 'eval "$(pyenv virtualenv-init -)"' >>~/.bashrcexec "$SHELL"
After this step, the ‘pyenv’ command should be available. We can install a Python version with the command below and set it as the global Python interpreter system-wide. It will take a little while, you have to be patient.
pyenv install -v 3.9.4
pyenv global 3.9.4
We can check out our current Python interpreter path and version with these commands. It should point to ‘/home/pi/.pyenv/shims/python3’
python3 -V
which python3
Also, there are a couple of useful pyenv commands which I think can be useful.
pyenv versions         # List installed versions on your system
pyenv global system    # Set system Python as default
pyenv global 3.9.4     # Set preferred Python version as default
pyenv uninstall 3.9.4  # Uninstall preferred Python version
pyenv commands         # See other pyenv commands
Conclusion
There is an official 45 sec YouTube video about the Raspberry Pi Imager that would cover more than half of this guide but my intention is to explain every step as detailed as it can to make a beginner comfortable with these tools and environments in the future. After these steps, we have a Raspberry Pi ready for almost any project-specific installation. Have fun with your tiny computer, thank you for your time.