Network Attached Storage with Raspberry Pi and Samba
NAS (Network Attached Storage) is a widely used technology for sharing a storage volume across local network. There are lots of different ways to do it. In this post I am setting up a NAS on Raspberry Pi with a USB storage by using Samba.
Why Samba? Because it's one of the best software to share a volume over network for different client types. We have Linux, MacOS, Windows, iPad OS, iOS, Android at home and we need all of them to be able to attach this volume without any additional software installation.
On a freshly installed Raspberry Pi, let's start with the usual:
sudo apt update && sudo apt upgradeInstall Samba
sudo apt install sambaFormat the USB Disk
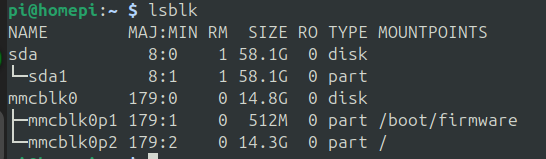
Plug in the USB drive to the Raspberry Pi. To identify the USB drive:
lsblkLook for the drive name (e.g., /dev/sda or /dev/sdb). In my case /dev/sda1
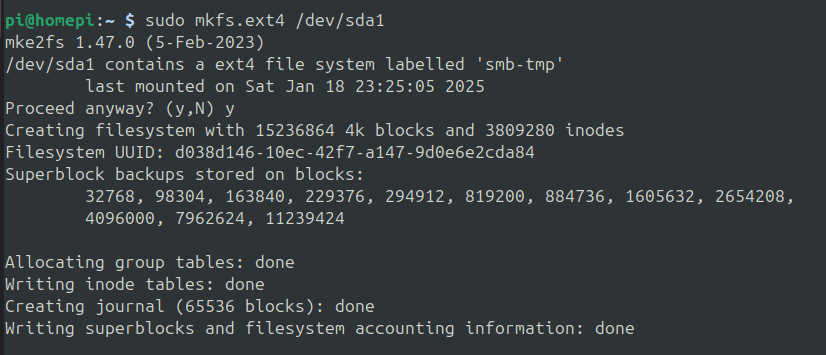
Format the drive to a Linux-friendly file system (e.g., ext4):
This will delete everything on the USB disk.
sudo mkfs.ext4 /dev/sda1After confirmation, just wait for it to finish formatting, it can take a while:
Create a mount point for the drive under /mnt with any name you wish:
sudo mkdir -p /mnt/homepi-smbConfigure Auto-Mount with fstab
Get the UUID of the drive:
sudo blkid
Find the line for your USB drive and note its UUID (in my case, UUID="d038d146-10ec-42f7-a147-9d0e6e2cda84").
Edit the fstab file:
sudo nano /etc/fstabAdd the following line to auto-mount the drive on boot. Obviously don't forget to replace the UUID with your disk's UUID and the mount point as the mount point you created earlier:
UUID=d038d146-10ec-42f7-a147-9d0e6e2cda84 /mnt/homepi-smb ext4 defaults,nofail,x-systemd.device-timeout=10 0 2The nofail option ensures the system boots even if the drive is missing. The x-systemd.device-timeout sets a 10-second wait for the drive.
Test the fstab changes:
sudo mount -aReload the systemd state as below if asks:
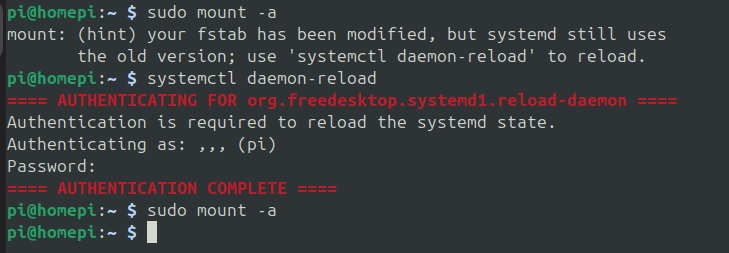
At the end, if there is no output for mount -a it means that all mounted fine.
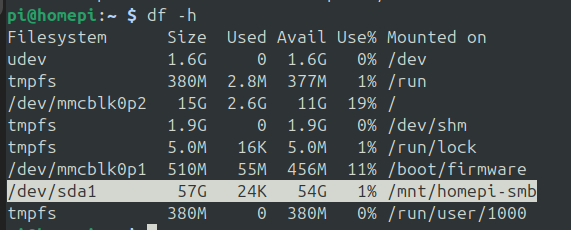
Ensure the mount works after a reboot:
sudo rebootIf everything look OK as below, proceed to the next steps.
Set Permissions for the USB Drive
Set a user (in my case, cb) to own the shared folder:
sudo useradd -m -s /bin/bash cbSet a password for the Samba user:
sudo smbpasswd -a cbChange ownership and permissions of the drive:
sudo chown -R cb:cb /mnt/homepi-smb
sudo chmod -R 775 /mnt/homepi-smb
Now the directory is owned by the newly created user:

Configure Samba
Open the Samba configuration file:
sudo nano /etc/samba/smb.confAdd the following share configuration at the bottom:
[homepi-smb]
comment = My shared network storage
path = /mnt/homepi-smb
browseable = yes
writable = yes
valid users = cb
create mask = 0664
directory mask = 0775
force user = cb
Test the Samba configuration:
sudo testparmRestart the Samba service:
sudo systemctl restart smbdConnect to the Network Share
On a Windows PC:
- Open File Explorer.
- Enter the Raspberry Pi's IP address in the format:
\\<Raspberry_Pi_IP>\homepi-smb
- Enter the Samba username (cb) and password.
On a Linux PC:
Use a file manager and enter
smb://<Raspberry_Pi_IP>/homepi-smbHave fun!