Install PostgreSQL on Raspberry Pi
According to the official PostgreSQL website, “PostgreSQL is a powerful, open source object-relational database system with over 30 years of active development that has earned it a strong reputation for reliability, feature robustness, and performance.”
In this post, I will be helping you to install PostgreSQL on Raspberry Pi. It can be used as a local test database while you are developing a web application on multiple devices in the same network. When testing your application, you can deploy it on Raspberry Pi, alongside the PostgreSQL database.
If you haven’t set up your Raspberry Pi with an operating system and established an SSH connection, you can follow this post: Headless Raspberry Pi Installation
1. Update the apt repository.
Before running any installation commands we have to make sure that our system is up to date and ready for installation. If you just installed your OS or have not updated it for a while, it might take some time.
sudo apt update && sudo apt upgrade -y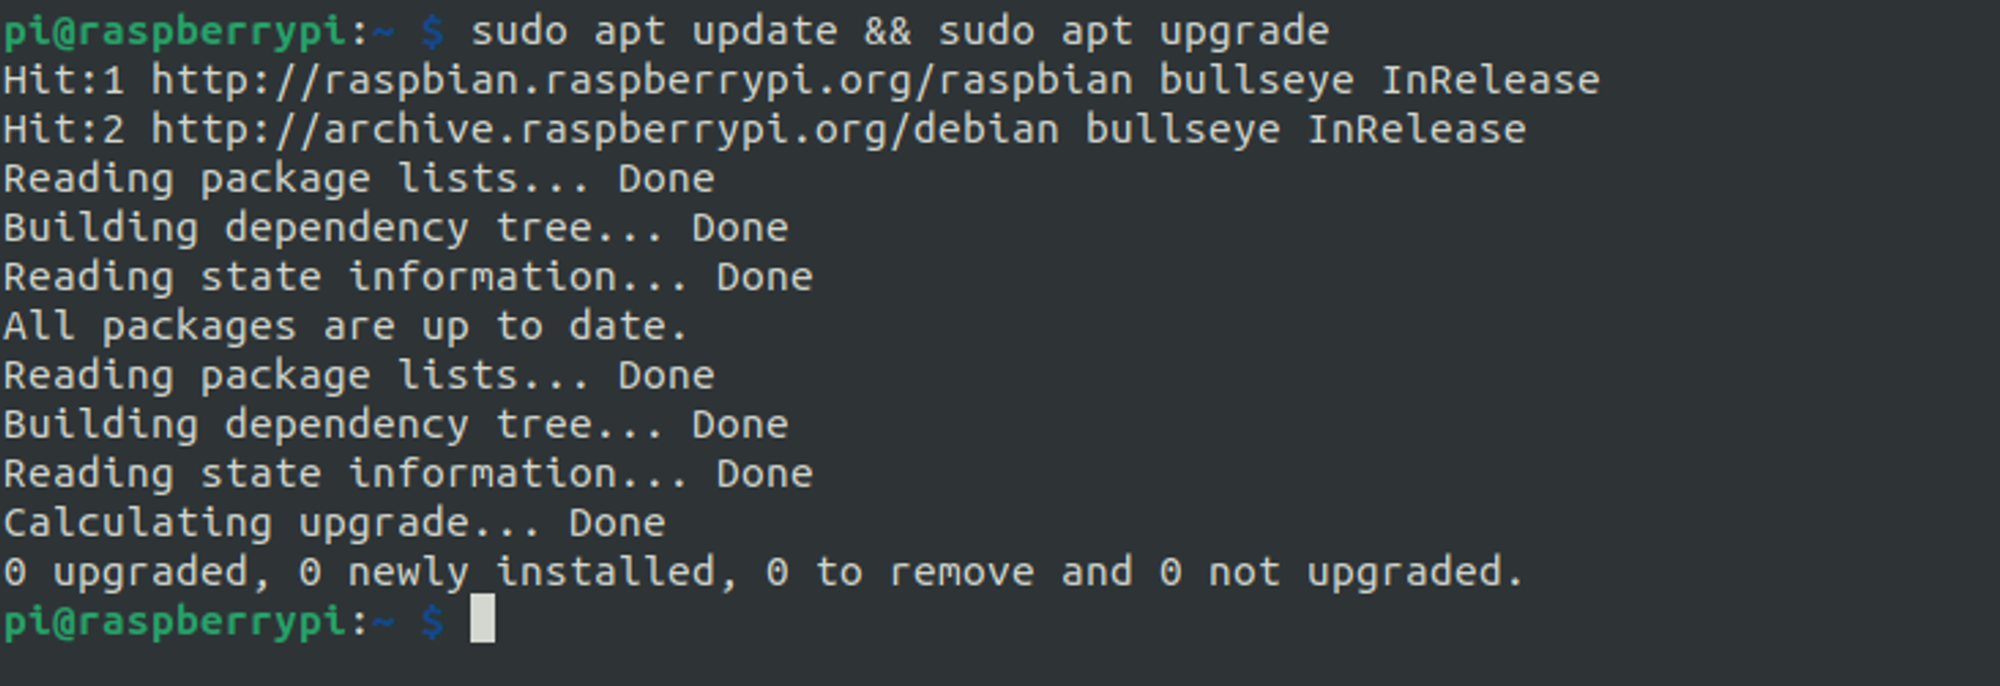
2. Install PostgreSQL on Raspberry Pi
Installation of the PostgreSQL on Raspberry Pi is quite straightforward actually. The only thing you need to do is to run the command below and the apt repository will handle the rest.
sudo apt install postgresql
3. Check if the PostgreSQL started automatically
When you install PostgreSQL with the apt repository, it will be started automatically. You can check if it is running by using the systemctl command.
sudo systemctl status postgresql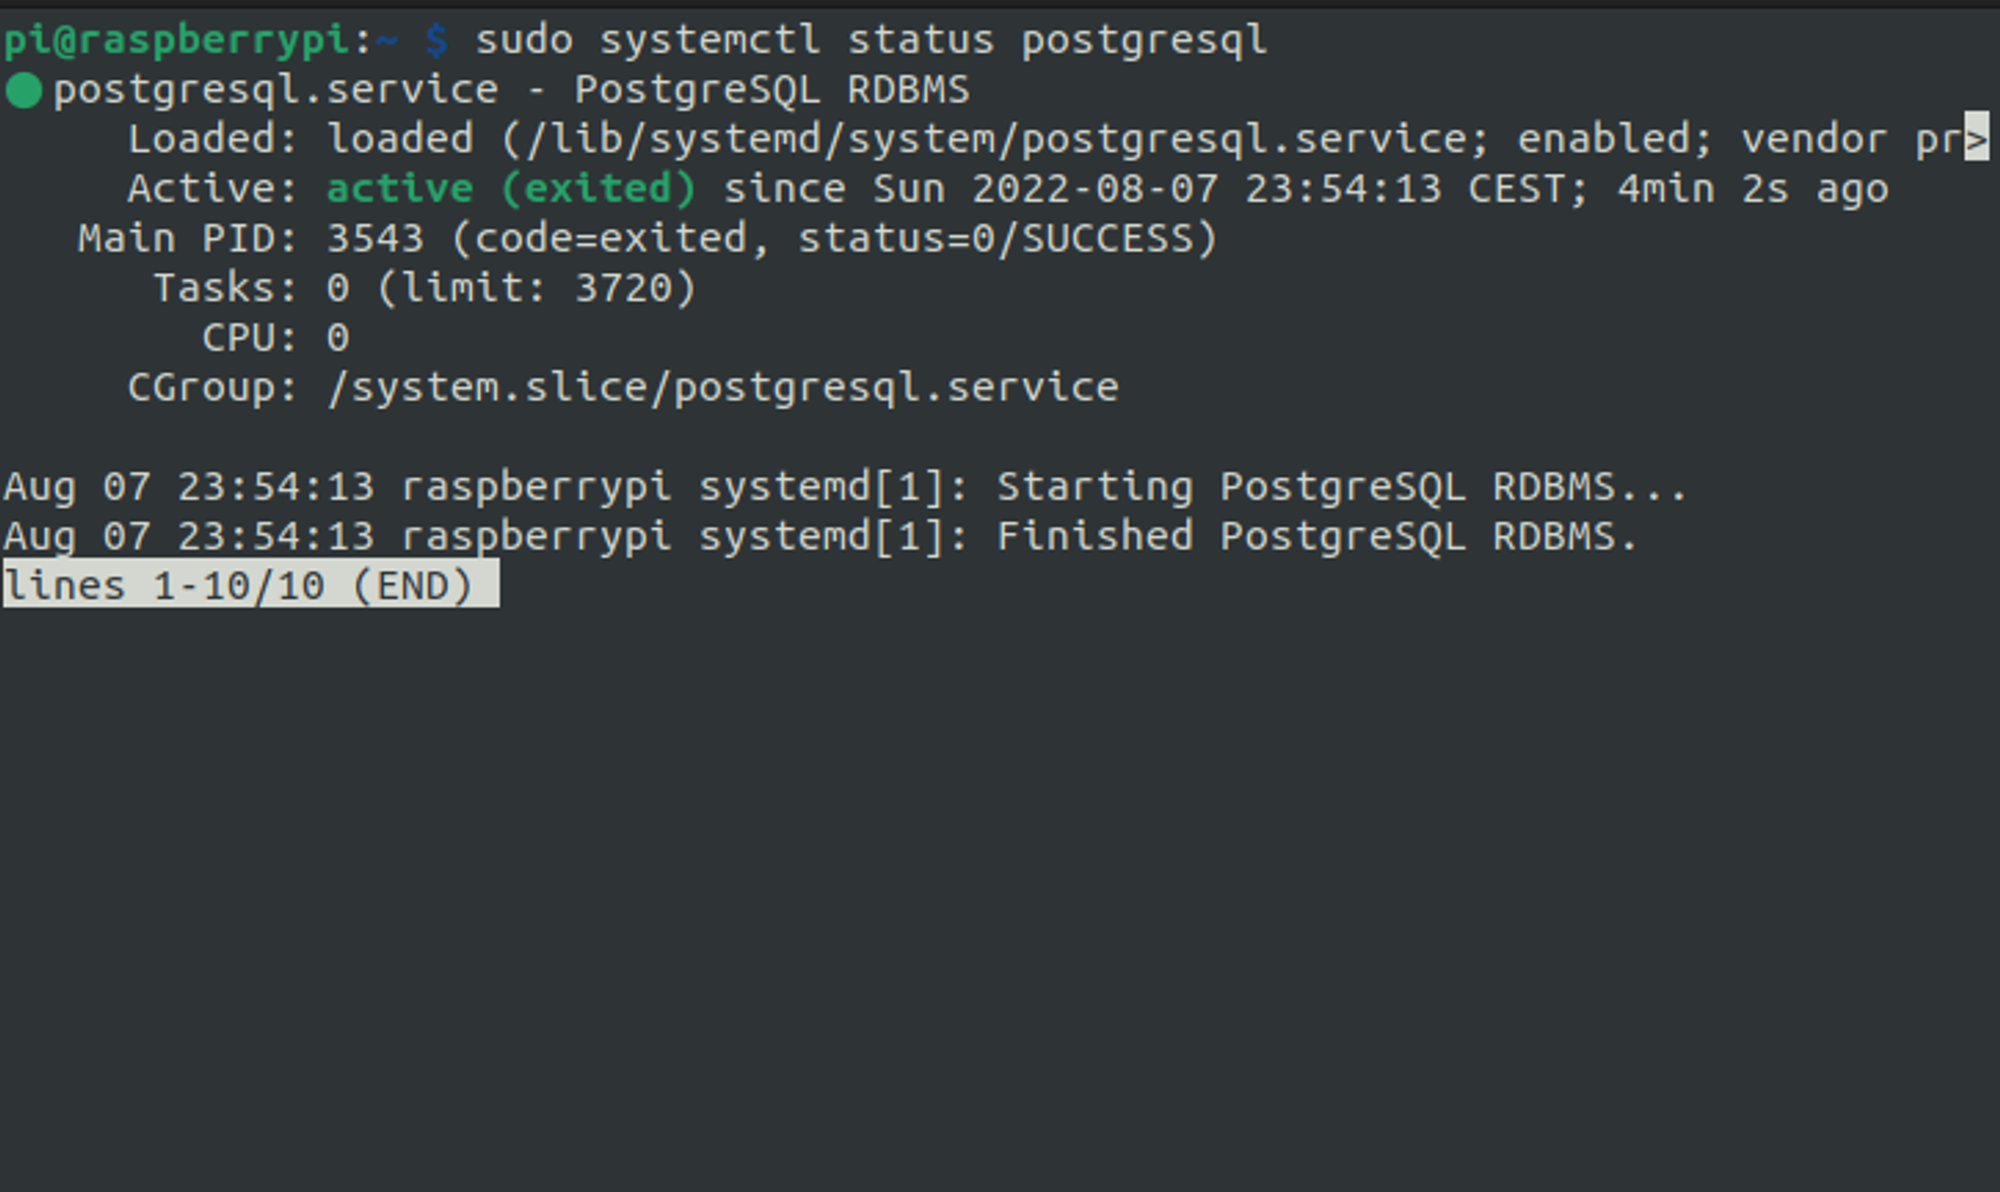
4. Switch to the postgres user
You need to switch to the postgres user in order to establish the initial connection with your freshly installed PostgreSQL service because it is the only user that it recognizes.

5. Create a new user for the PostgreSQL
In order to create a new user, you can use the createuser command. By using the --interactive flag we are able to make decisions while creating a new user.
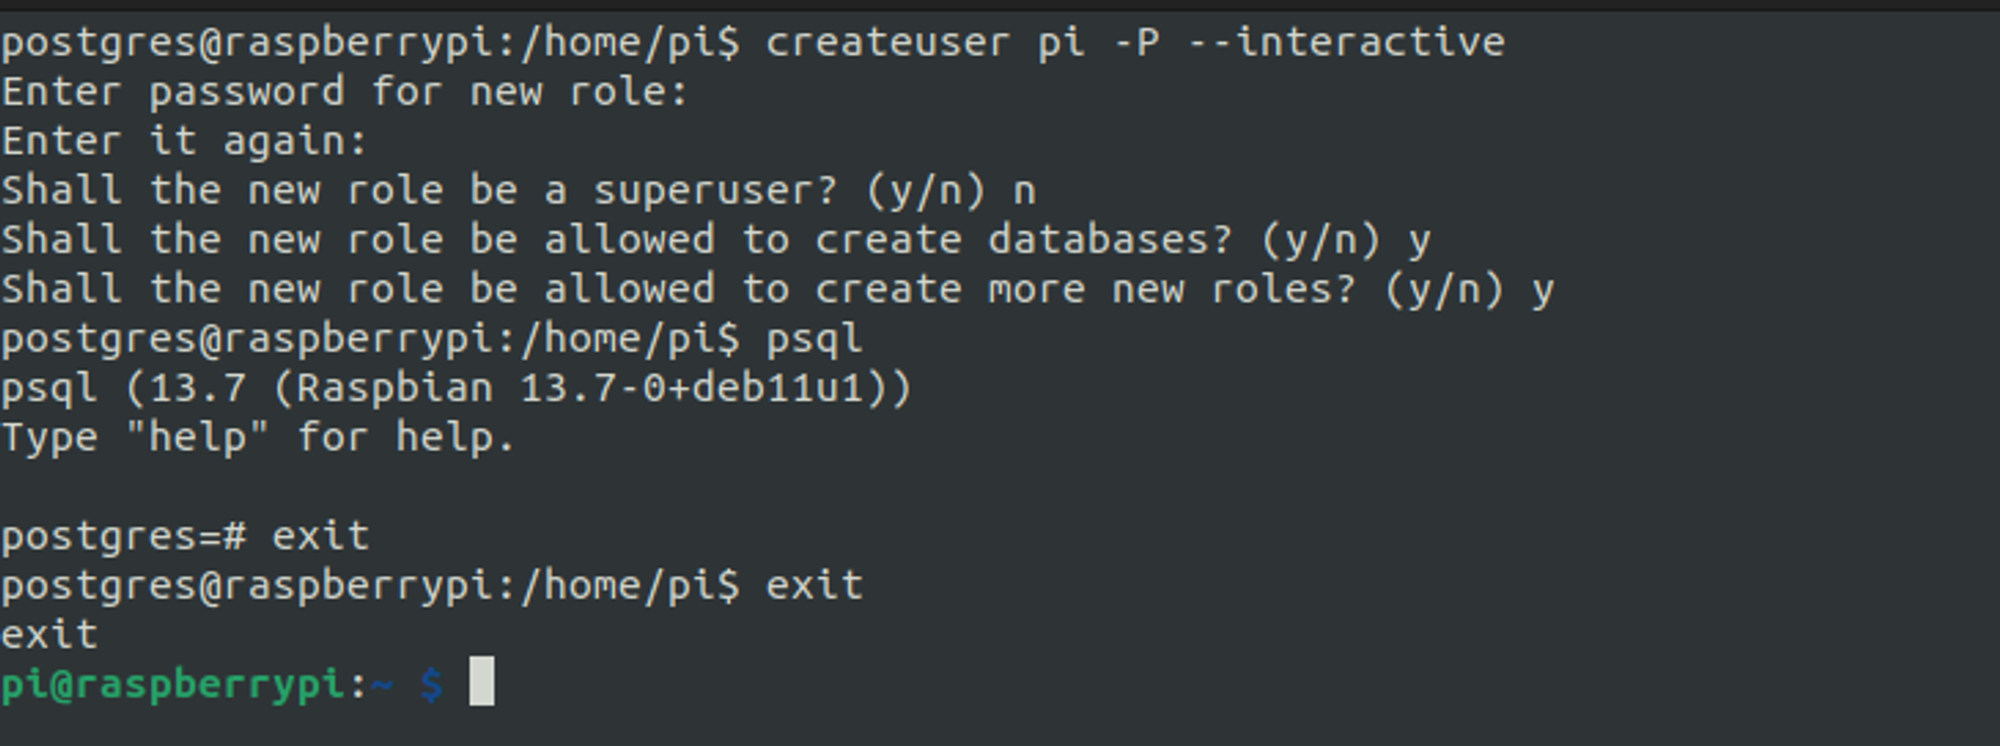
createuser pi -P --interactiveAfter executing this command, you need to enter a secure password for the pi user of PostgreSQL. Be careful, this is not the system user pi, this user belongs to PostgreSQL and you will be using these credentials to establish a connection to your database.
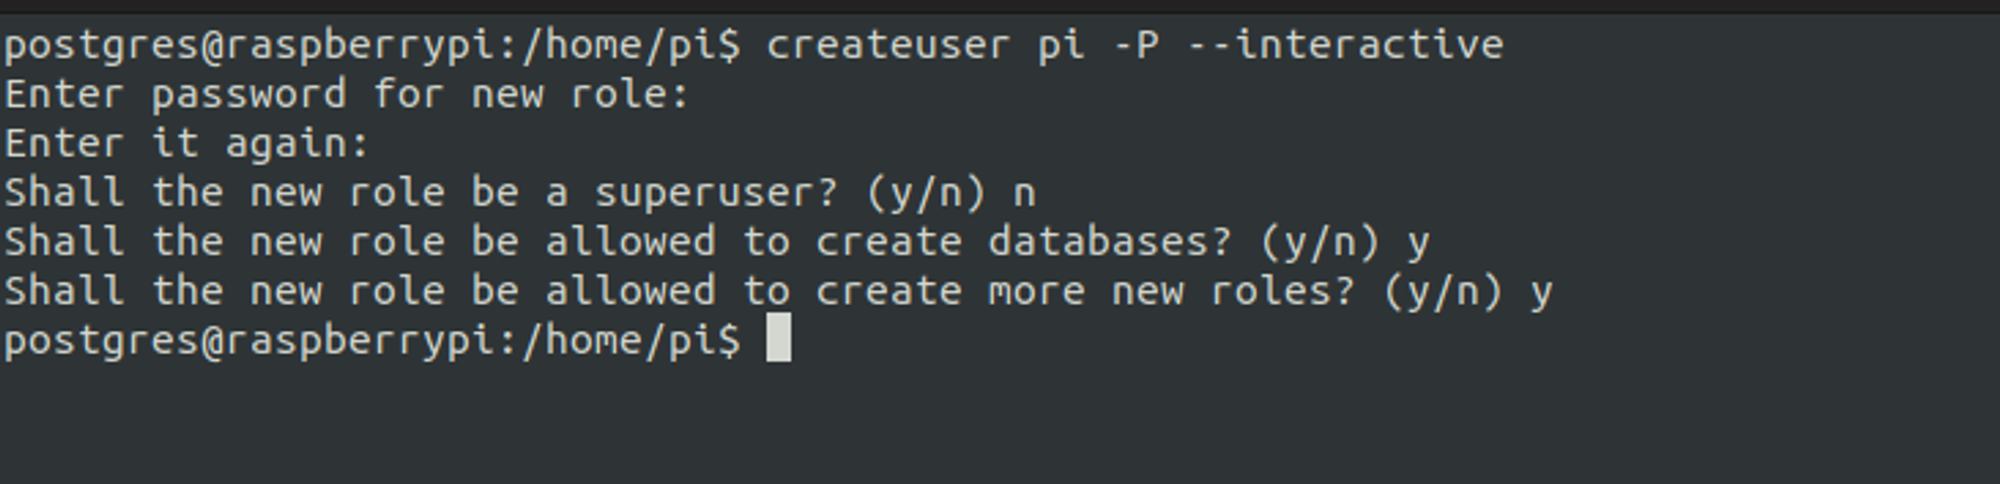
You need to verify your password after entering it for the first time. After that, it will ask if you want this user to be a superuser, you can choose n for no. I gave the new user permission to create new databases and new roles so I will be using this user to manage my databases and the roles. You can customize these settings according to your needs.
6. Connect to the PostgreSQL CLI (Command Line Interface)
You can use psql command to connect to the PostgreSQL CLI tool and you can use SQL queries inside this interface.
After testing that you are able to connect there, you can exit with the exit command, and use exit one more time to exit the posgres user.
7. Create a new database
In order to use the PostgreSQL database server of course you need a database.
Connect to the PostgreSQL CLI with the following command:
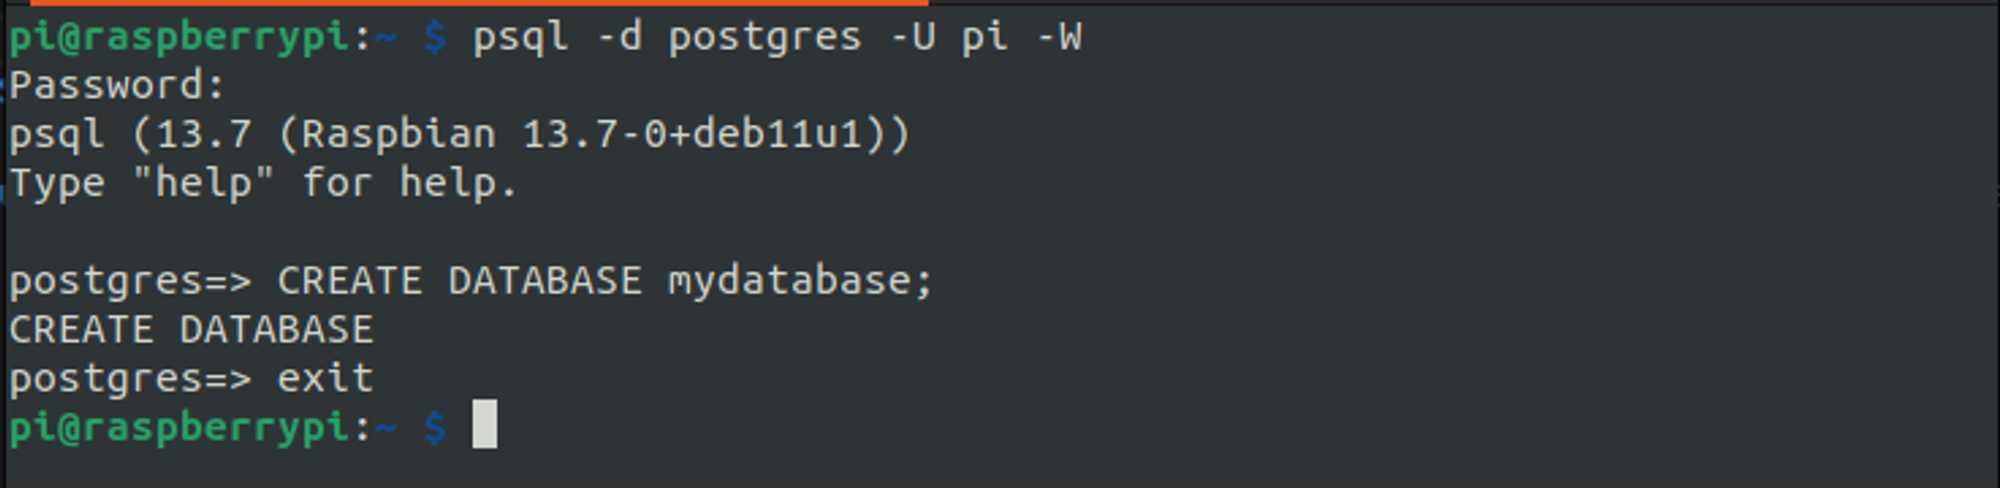
psql -d postgres -U pi -WThe -W flag at the end will make the CLI tool ask for the password. After entering your password you will be able to run SQL queries in the CLI tool, run the following query (give it any name you want):
CREATE DATABASE mydatabase;Finally, the whole process should look like this:
8. Give access to all users for all databases
Yes, it doesn’t sound very secure; indeed it is not. We are just setting up a test database to tinker around and connect to all databases with our user pi. If you need a proper production setup with your database, first think about using the Raspberry Pi as the database server (it is not the best option by far) and then consume the official documentation and try to consult professionals. The production database is a serious installation, and this is not a production database.
To do what we want, open the pg_hba.conf in nano with sudo as in the following image. Be sure that this file exists in your system (The PostgreSQL version might be changed or the file path might be changed with the new PostgreSQL versions):

Insert a new line around the area shown in the image below.
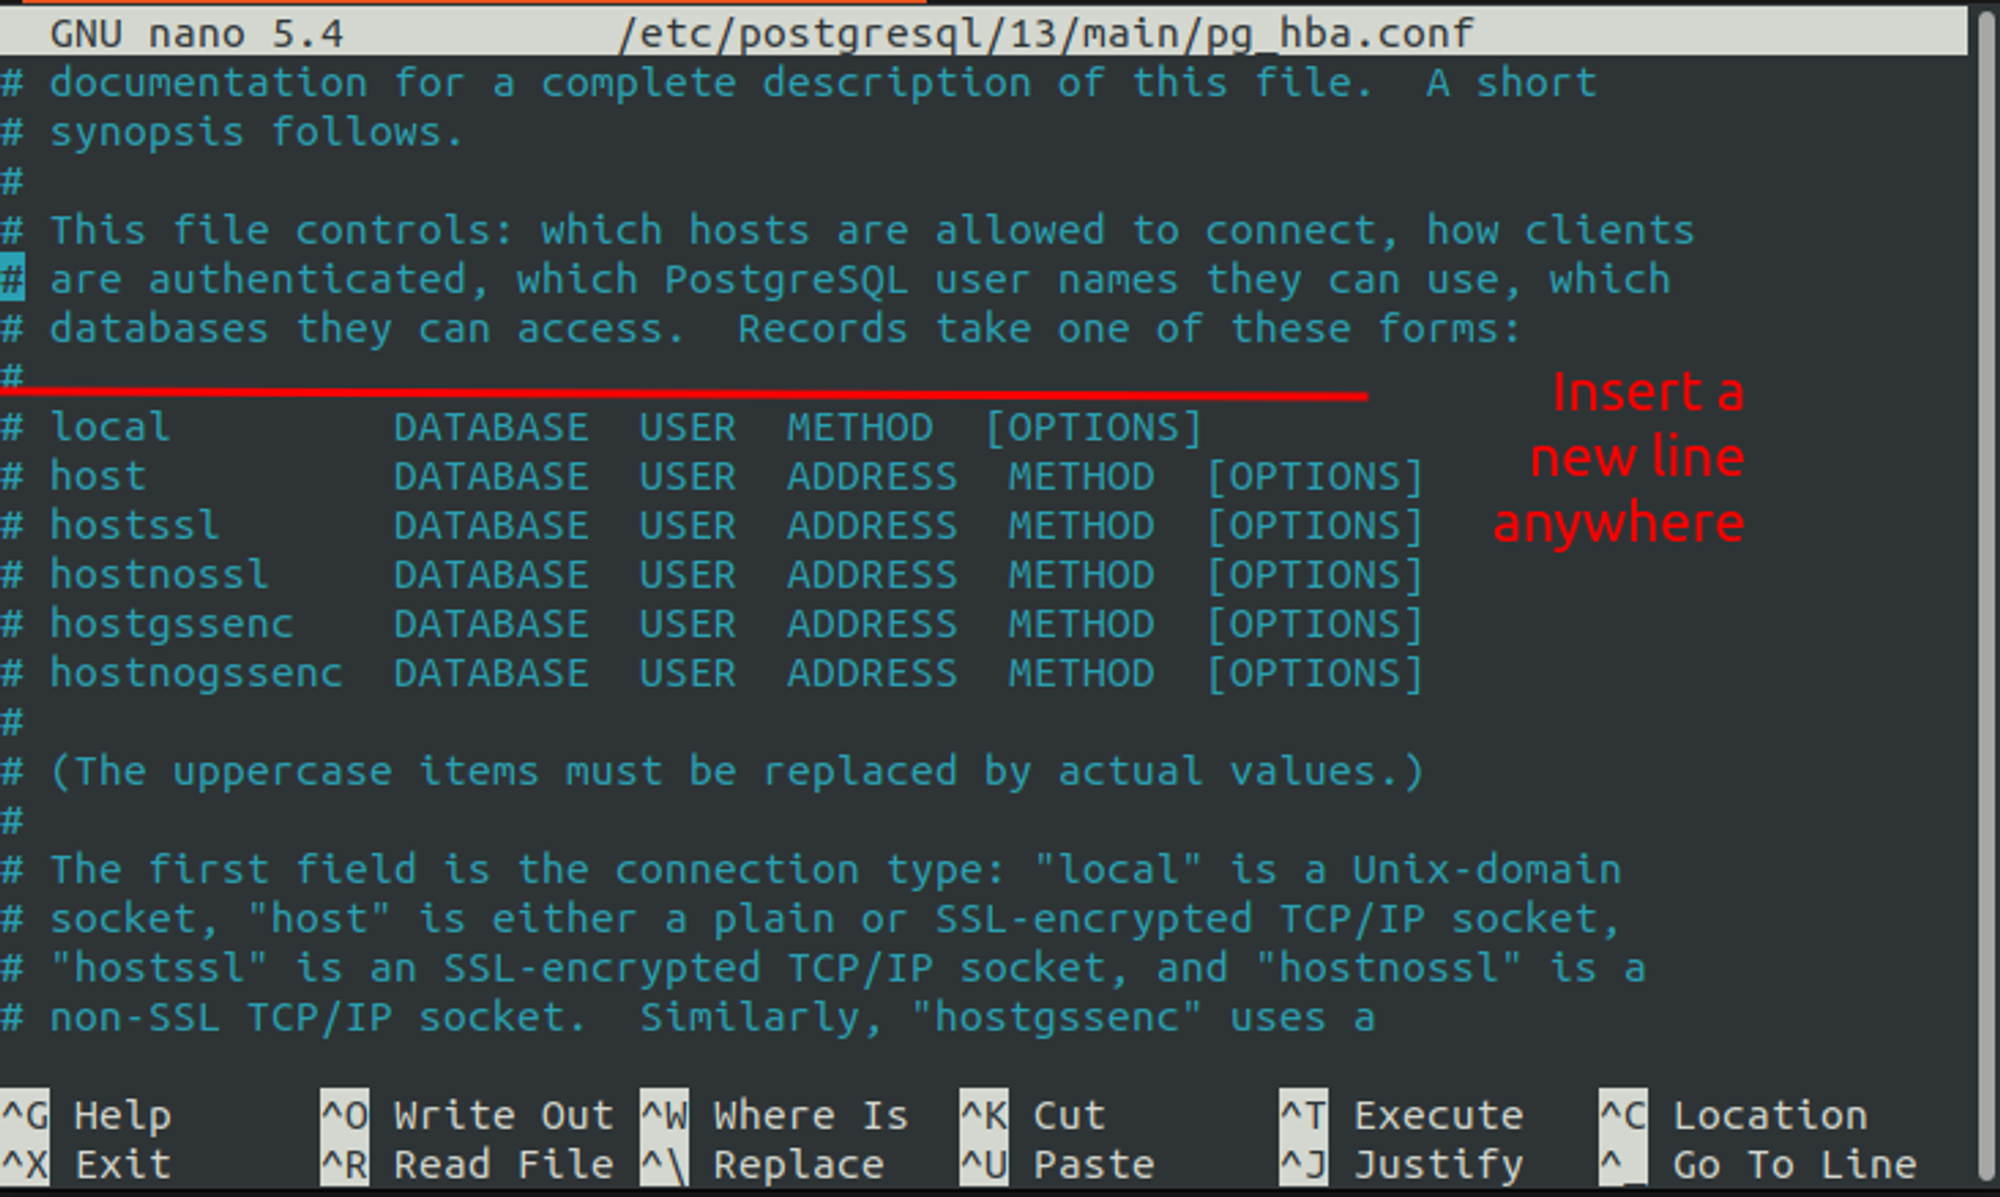
Add this to the new line as in the image:
host all all 0.0.0.0/0 md5
9. Make your database listen for the remote connections
By default, the PostgreSQL server is listening only for the local connections. This is secure, but we need to access it from another device so we need to make it listen for remote connections.
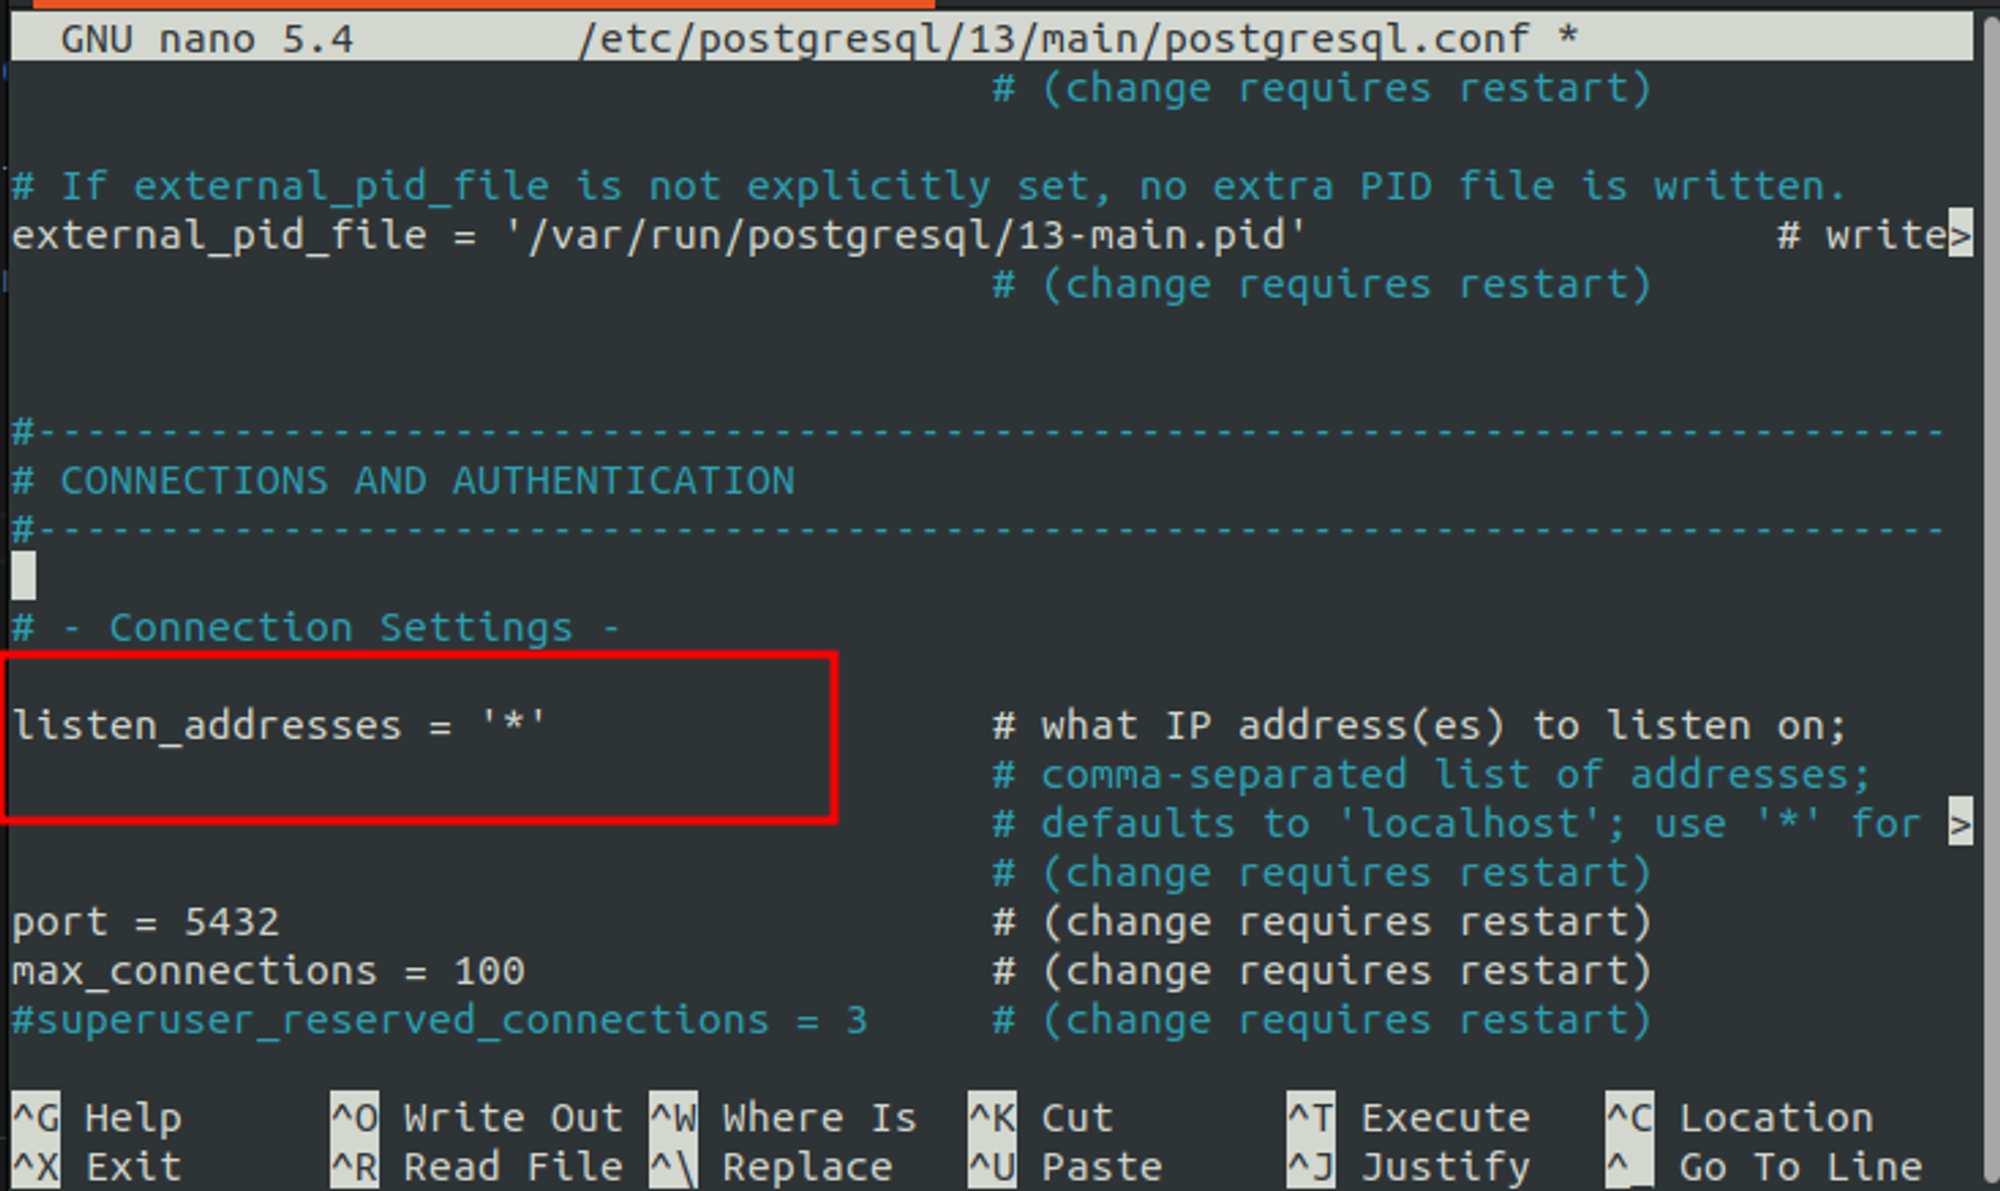
Open the postgresql.conf file in the following path with nano. Don’t forget to use sudo, otherwise, you will not be able to save it.

Go to the line shown in the image below.

Uncomment it by removing the # symbol at the beginning and replacing localhost with a *. This will allow remote connections.
Restart the postgresql service using systemctl.
sudo systemctl restart postgresql
11. Connect to your database
With a remote device in the same network as your Raspberry Pi, use the following line to connect to your database on the Raspberry Pi. Do not forget to change the IP address to the actual IP address of the Raspberry Pi in your network and also the other parameters as you customize it according to your needs. Your computer might need postgresql installed on your system in order to connect.
psql -h 192.168.1.30 -p 5432 -d mydatabase -U pi -W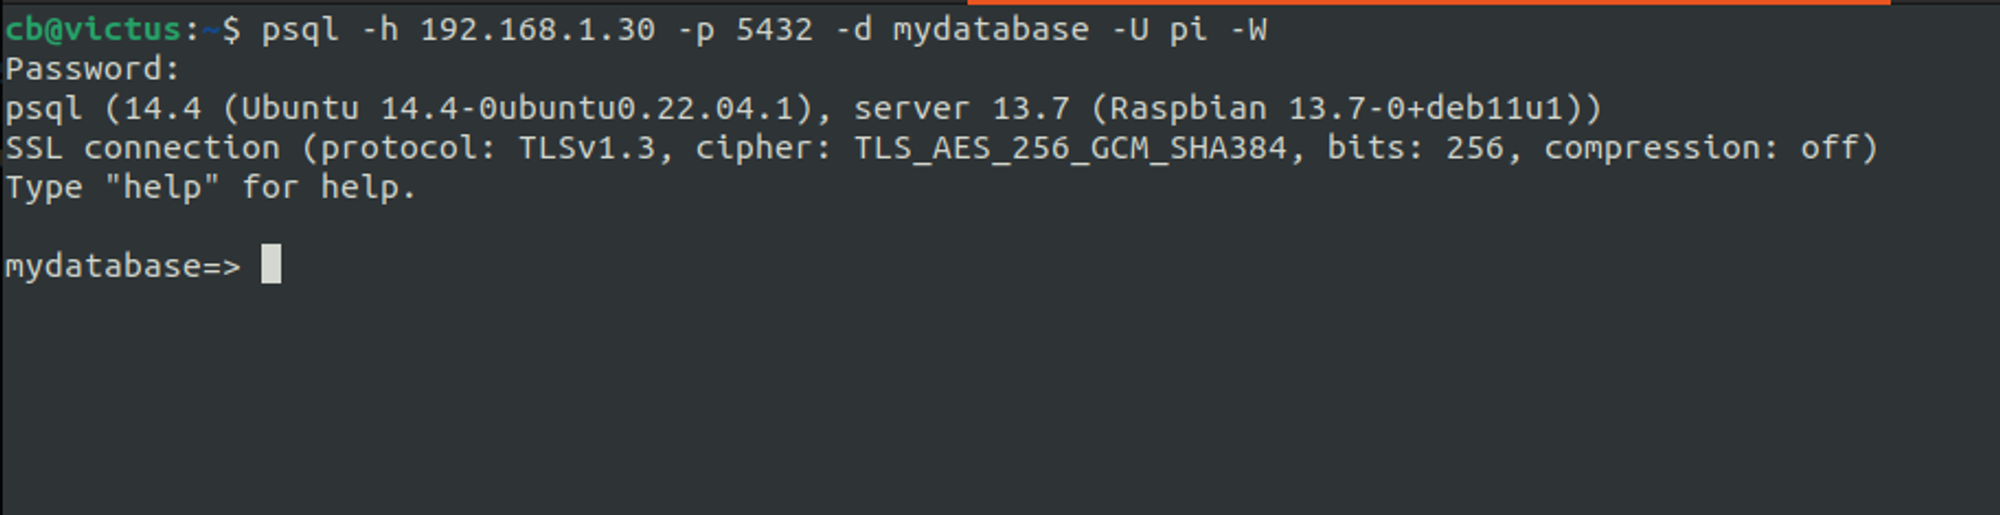
For more information, you can use the official documentation of PostgreSQL: https://www.postgresql.org/docs/
Have fun with the PostgreSQL on Raspberry Pi!