OpenCV Python Installation for Raspberry Pi
Installing OpenCV on Raspberry Pi has been a challenge a couple of years back from now, but it changed. Now we are able to install pre-compiled OpenCV Python binaries for Raspberry Pi with the pip package manager. This means we don’t actually need to compile it from the source code. If you are just getting started with Raspberry Pi and image processing, the compilation process can be quite exhausting and shift the target of your effort from the actual project to installation.
You should already have a Python and pip installed Raspberry Pi, if not please follow this post.
Let’s get started.
1. Update your apt repository.
Connect your Raspberry Pi with SSH (or use it with a monitor, mouse, and keyboard of course) and update the apt repositories.
sudo apt update2. Update pip, setuptools and wheel.
The package manager will be using these packages to install prebuilt binaries.
pip install --upgrade pip setuptools wheel3. Install requirements
Some of these packages are for the GUI components of the OpenCV and you will not need them if you are going to install the headless versions but installing all won’t hurt if you are not low on space.
sudo apt-get install -y libhdf5-dev libhdf5-serial-dev python3-pyqt5 libatlas-base-dev libjasper-dev4. Check your Python and pip installation
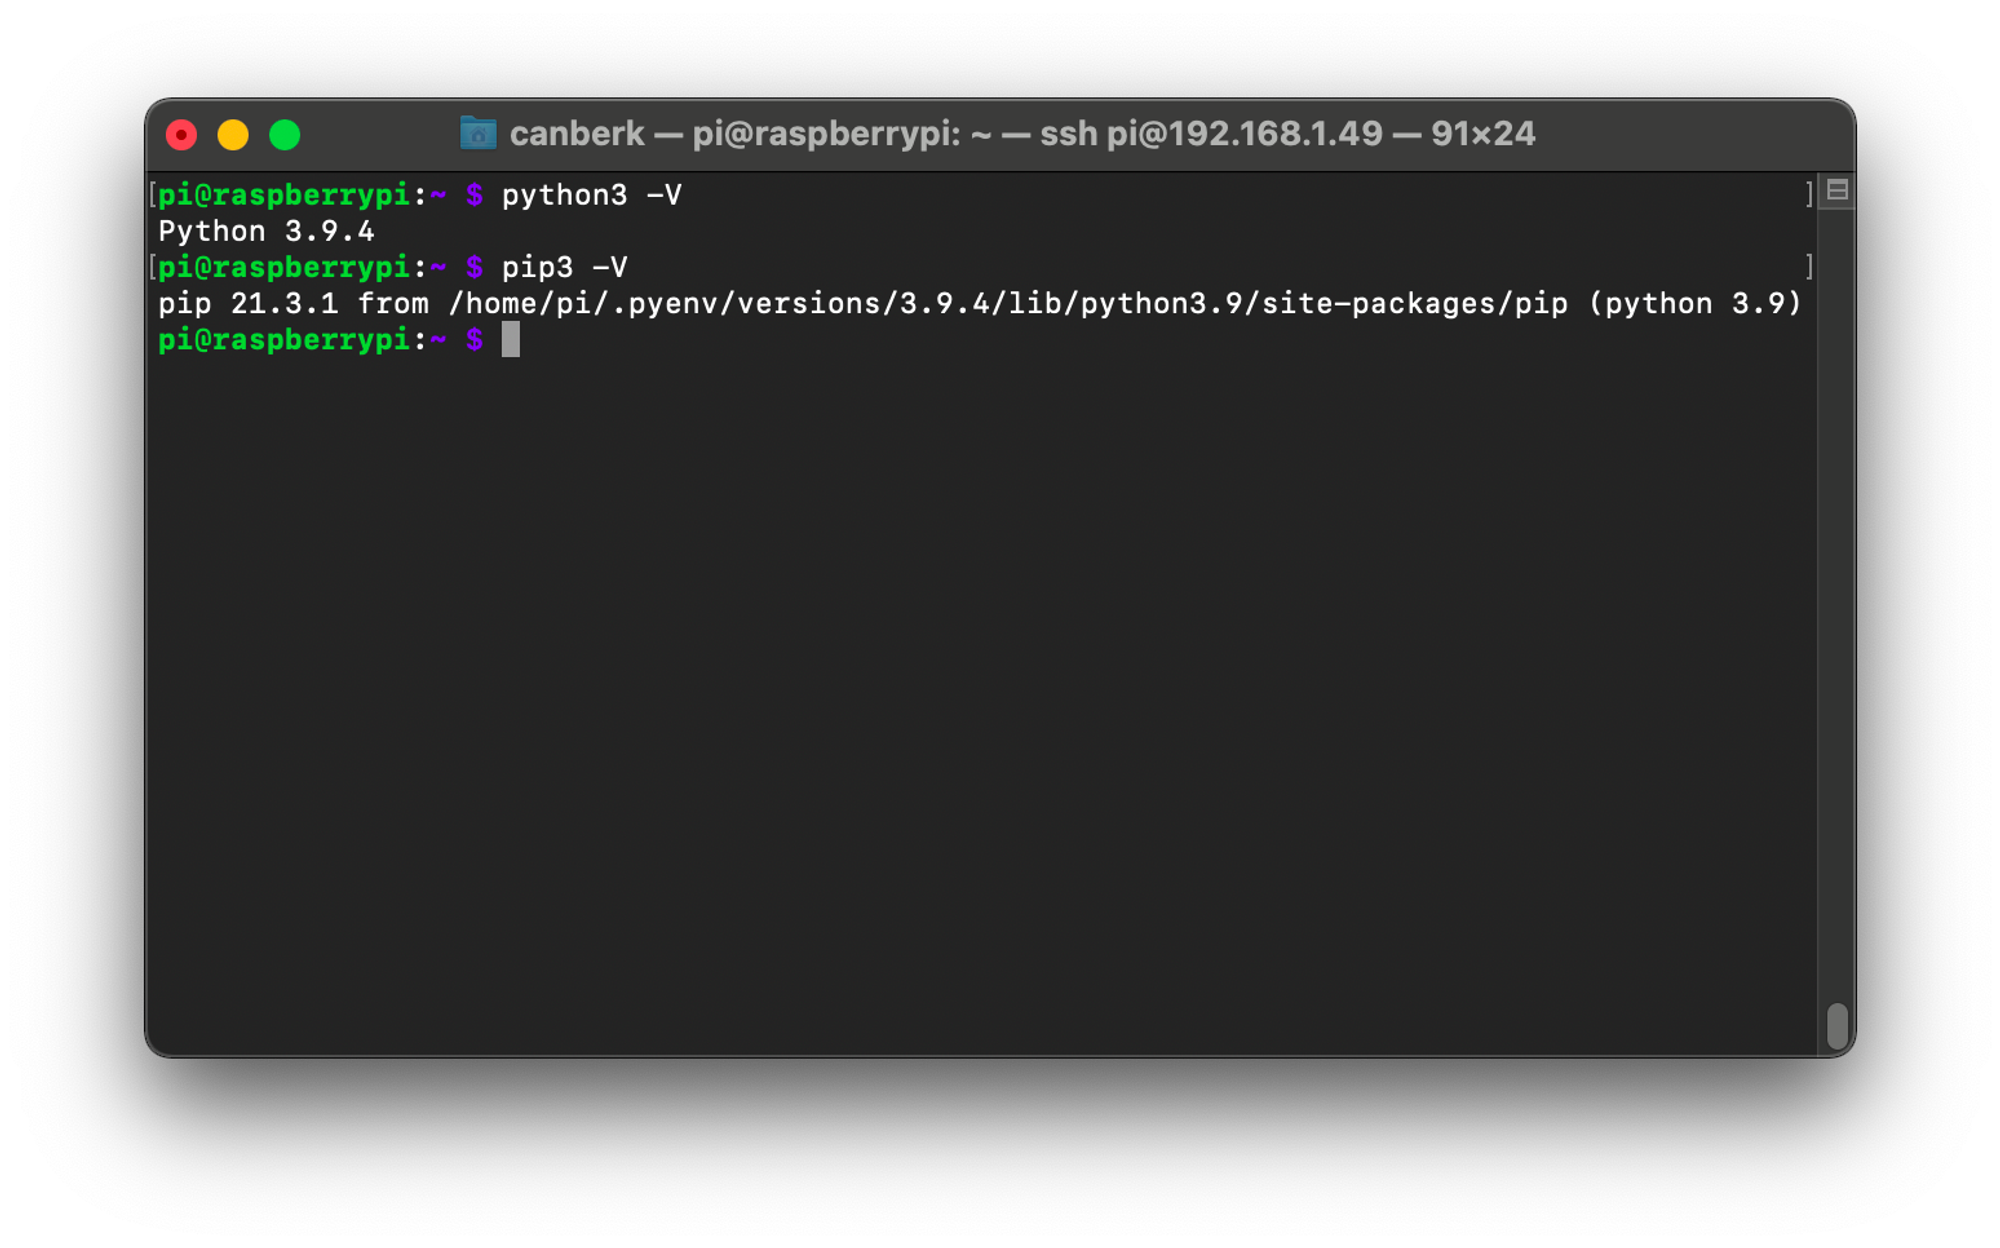
To check if you have Python3 and pip installed on your system, run the following commands.
python3 -V
pip3 -V
The output should be as in the image if you are using pyenv, versions of course may differ by your choice and the latest available versions.
5. Select your OpenCV package and install it
There are 4 different types of OpenCV releases that can be suitable for our usage. The main differences are the graphical user interface and extra modules. All of them are official releases. These are your choices:
- opencv-python: The main library. GUI components are included (such as cv2.imshow() and extra modules are not included.
- opencv-python-headless: Headless version of the main library. Headless means there are no components for GUI. So you will not be able to show interfaces in the graphical user interface of the Raspberry Pi. This can be useful when you use Raspberry Pi OS without a desktop environment (Raspberry Pi OS Lite) for robotics or other projects that won’t require an interface directly from Raspberry Pi.
- opencv-contrib-python: The main library plus extra modules that contributed. You can find a list of modules here. I am going to be following this package and I suggest it if you are not low on space or have other reasons not to.
- opencv-contrib-python-headless: Headless version of contrib package. The same case with the main headless package, this one does not include GUI modules.
You can find available packages, versions and compatibility maps here for opencv-contrib-python. I am using Bullseye with Python 3.9 and the latest available opencv-contrib-python version for me is ‘4.5.3.56’ (If you are using Pi Zero you need to check for armv6l packages and if you are using Pi 3, Pi 4 or Pi Zero 2W you need to check the armv7l packages.)
You can check your OS version with the cat /etc/os-release command.
You can install the selected package by executing the following command:
pip install opencv-contrib-python==4.5.3.56It should take around one minute (internet connection speed effects of course) and download only prebuilt binaries around 20-30 MBs. If pip starts downloading a .tar.gz file around 150 MB and starts building wheels, it means that a precompiled binary is not available for that version, you need to cancel the installation and choose another one or wait for the long compilation process to succeed.
6. Check your installation
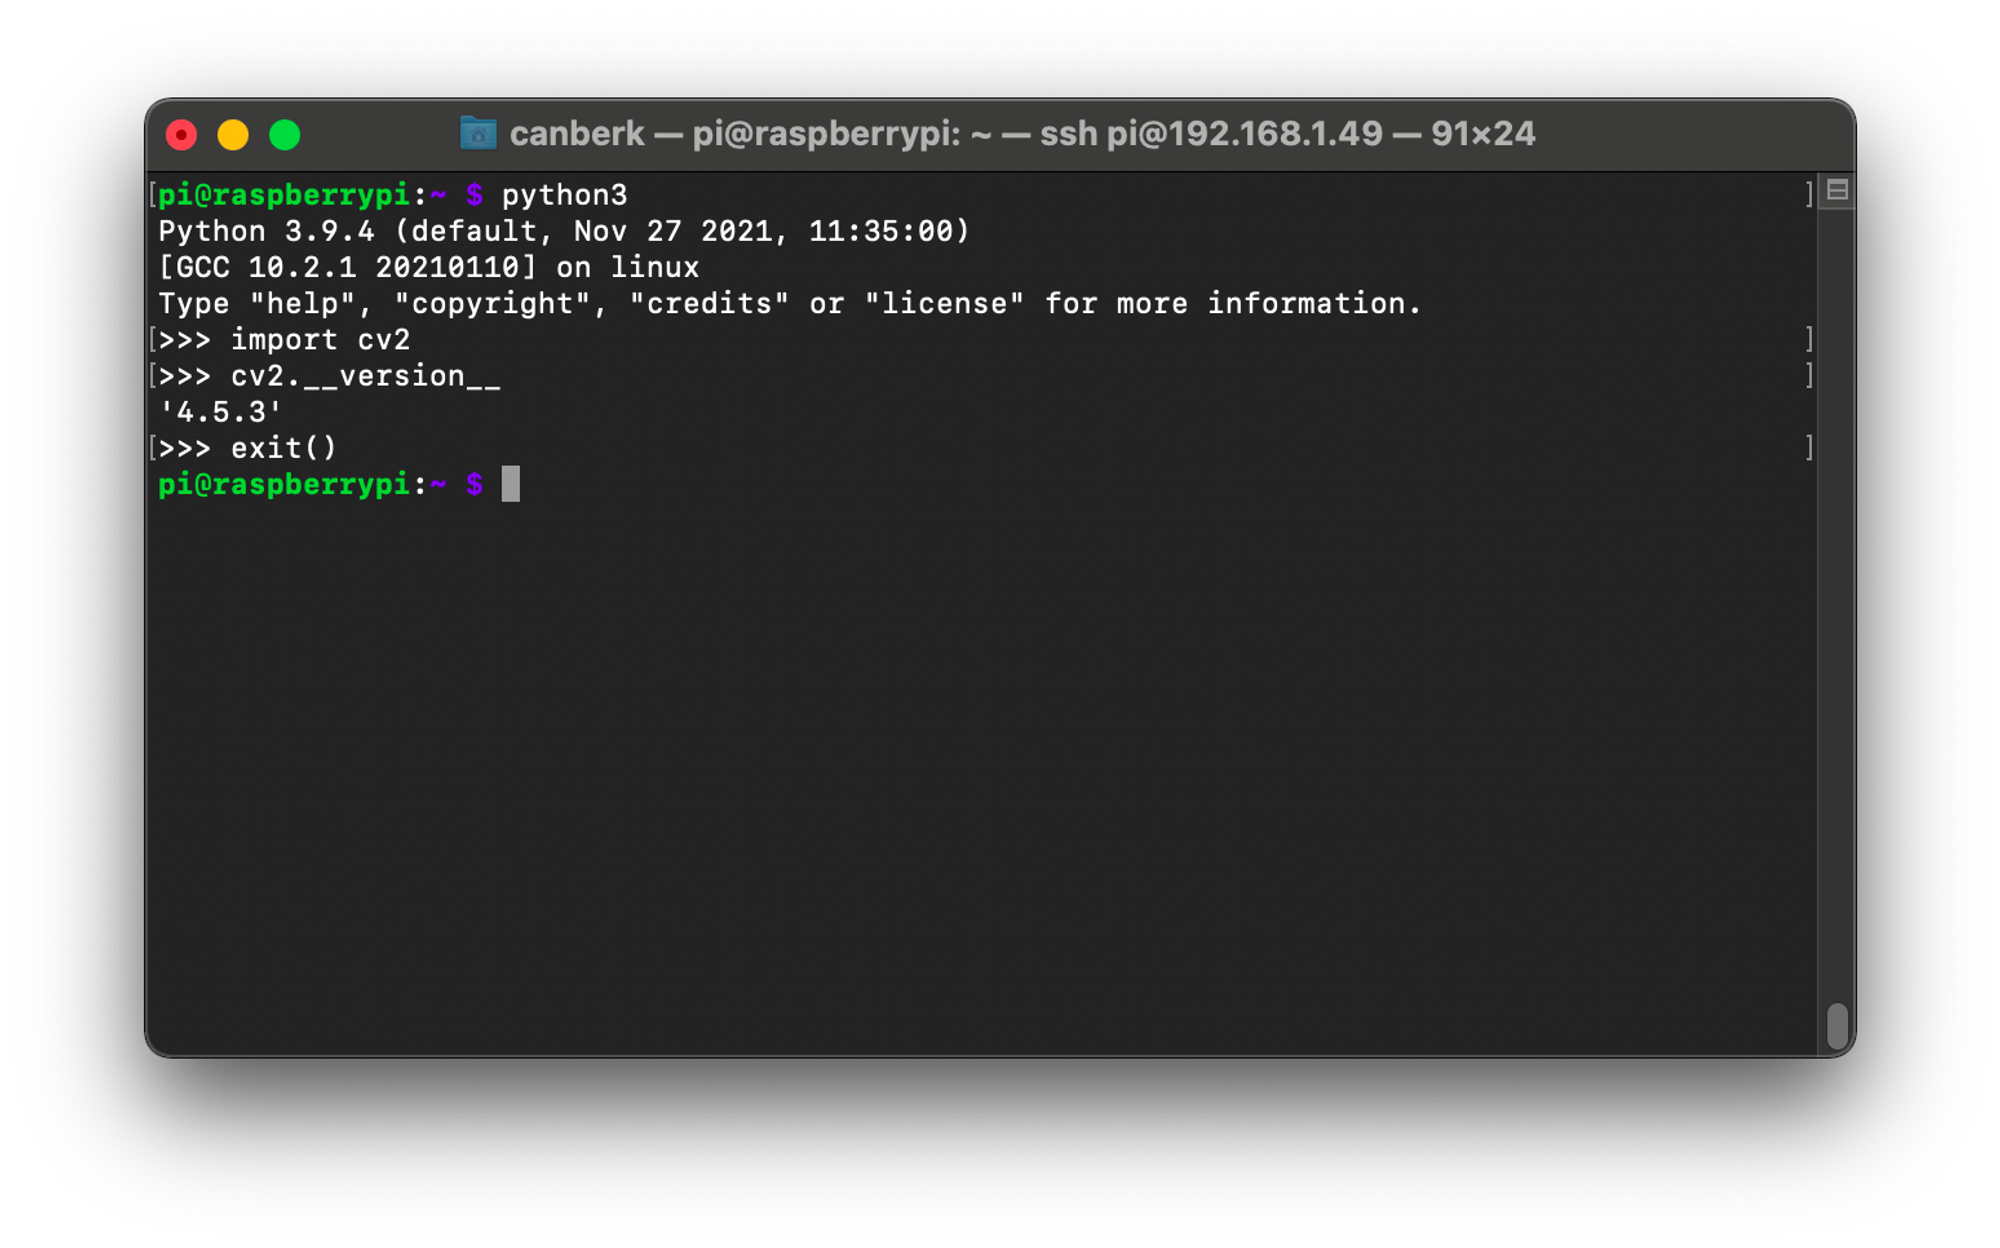
You can check the installation easily by entering the python console with python3 command and importing cv2 with import cv2 line and checking the OpenCV version by executing cv2.__version__ and exiting by adding exit() to your python console. It should look like this:
7. Enable Pi Camera
If you are going to use the Raspberry Pi Camera as input for your image processing project, you need to enable camera input for your system.
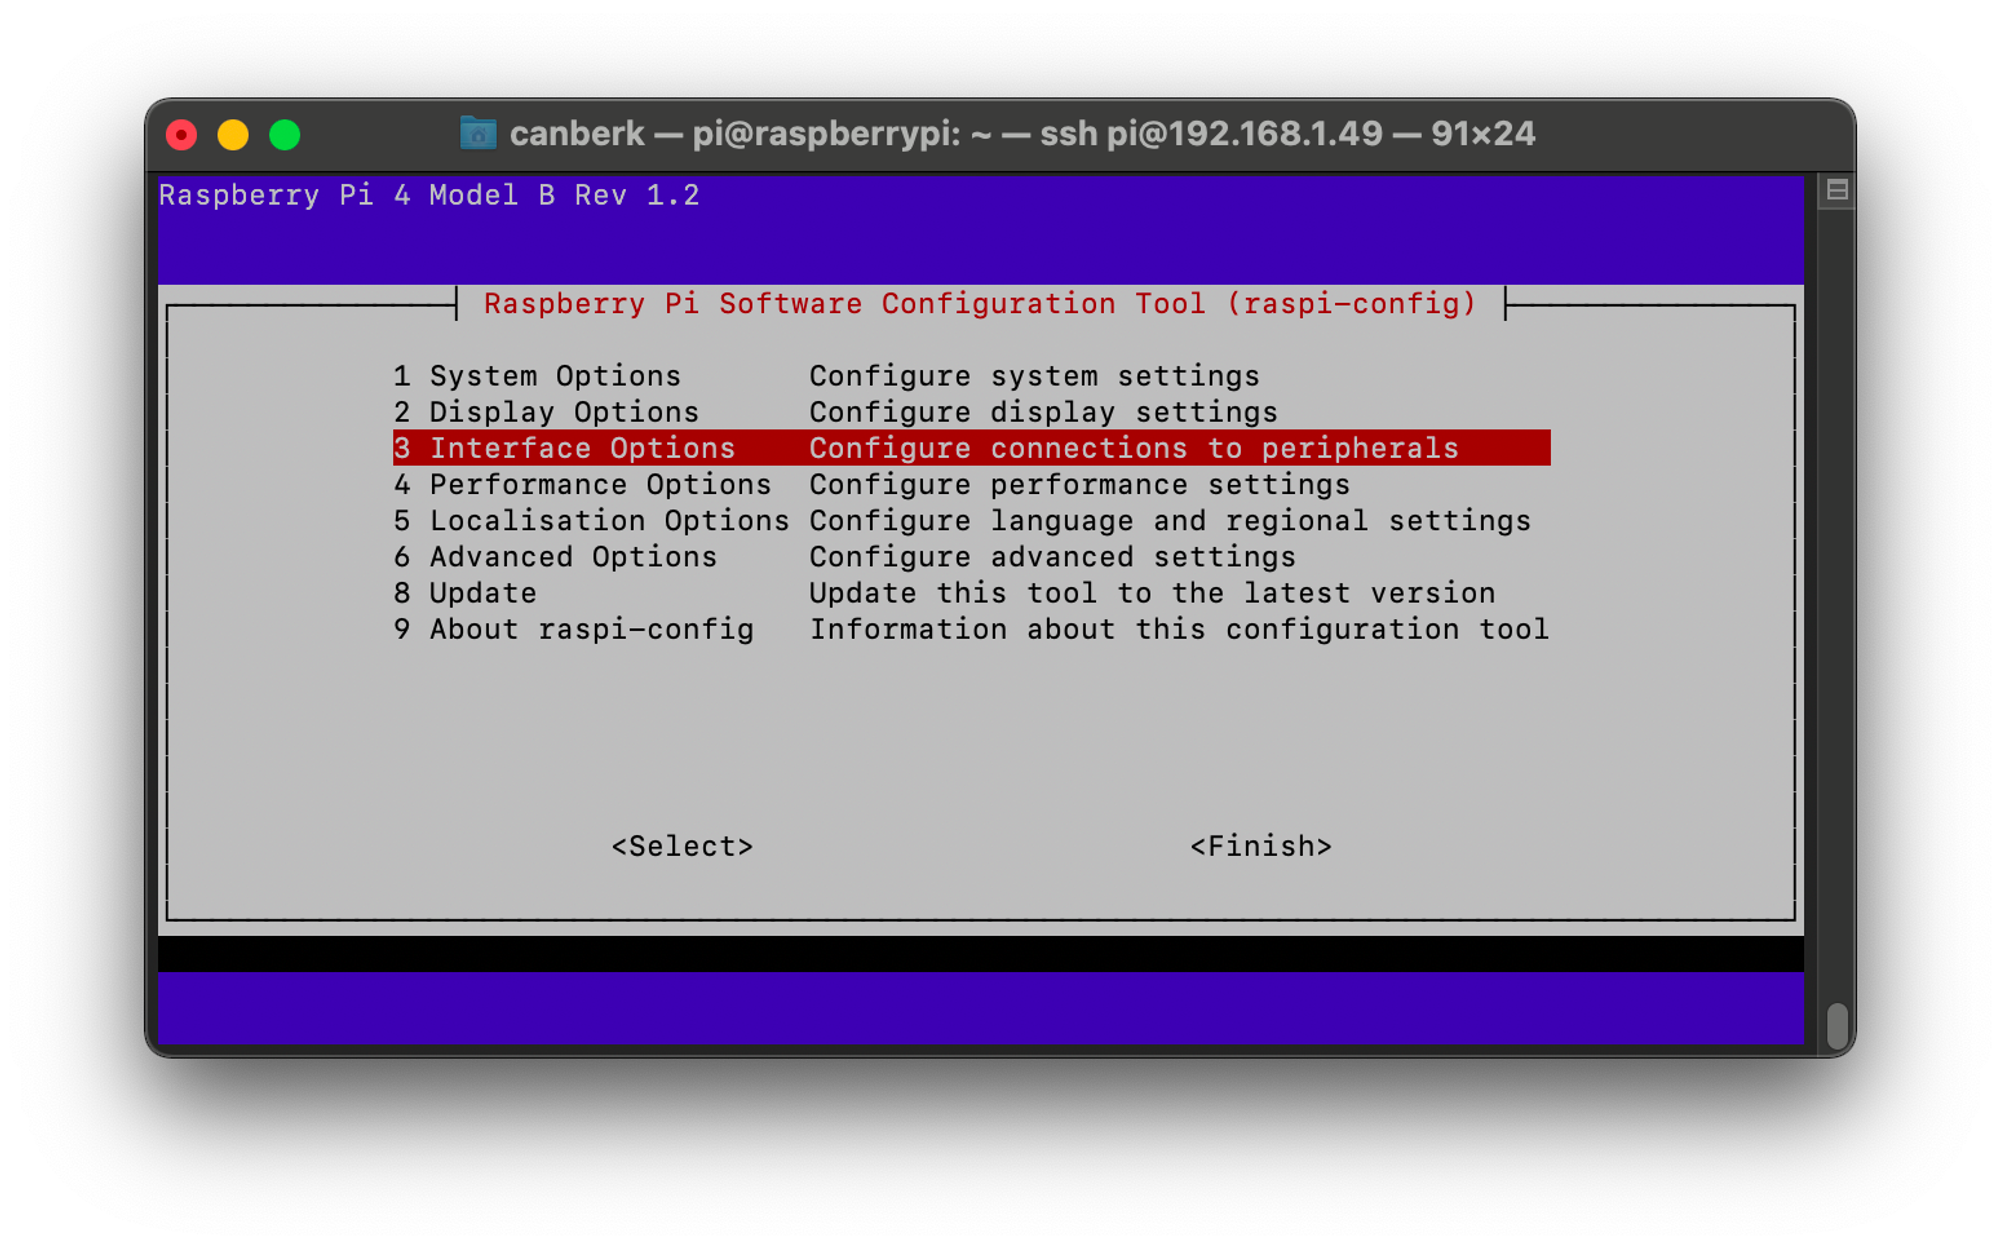
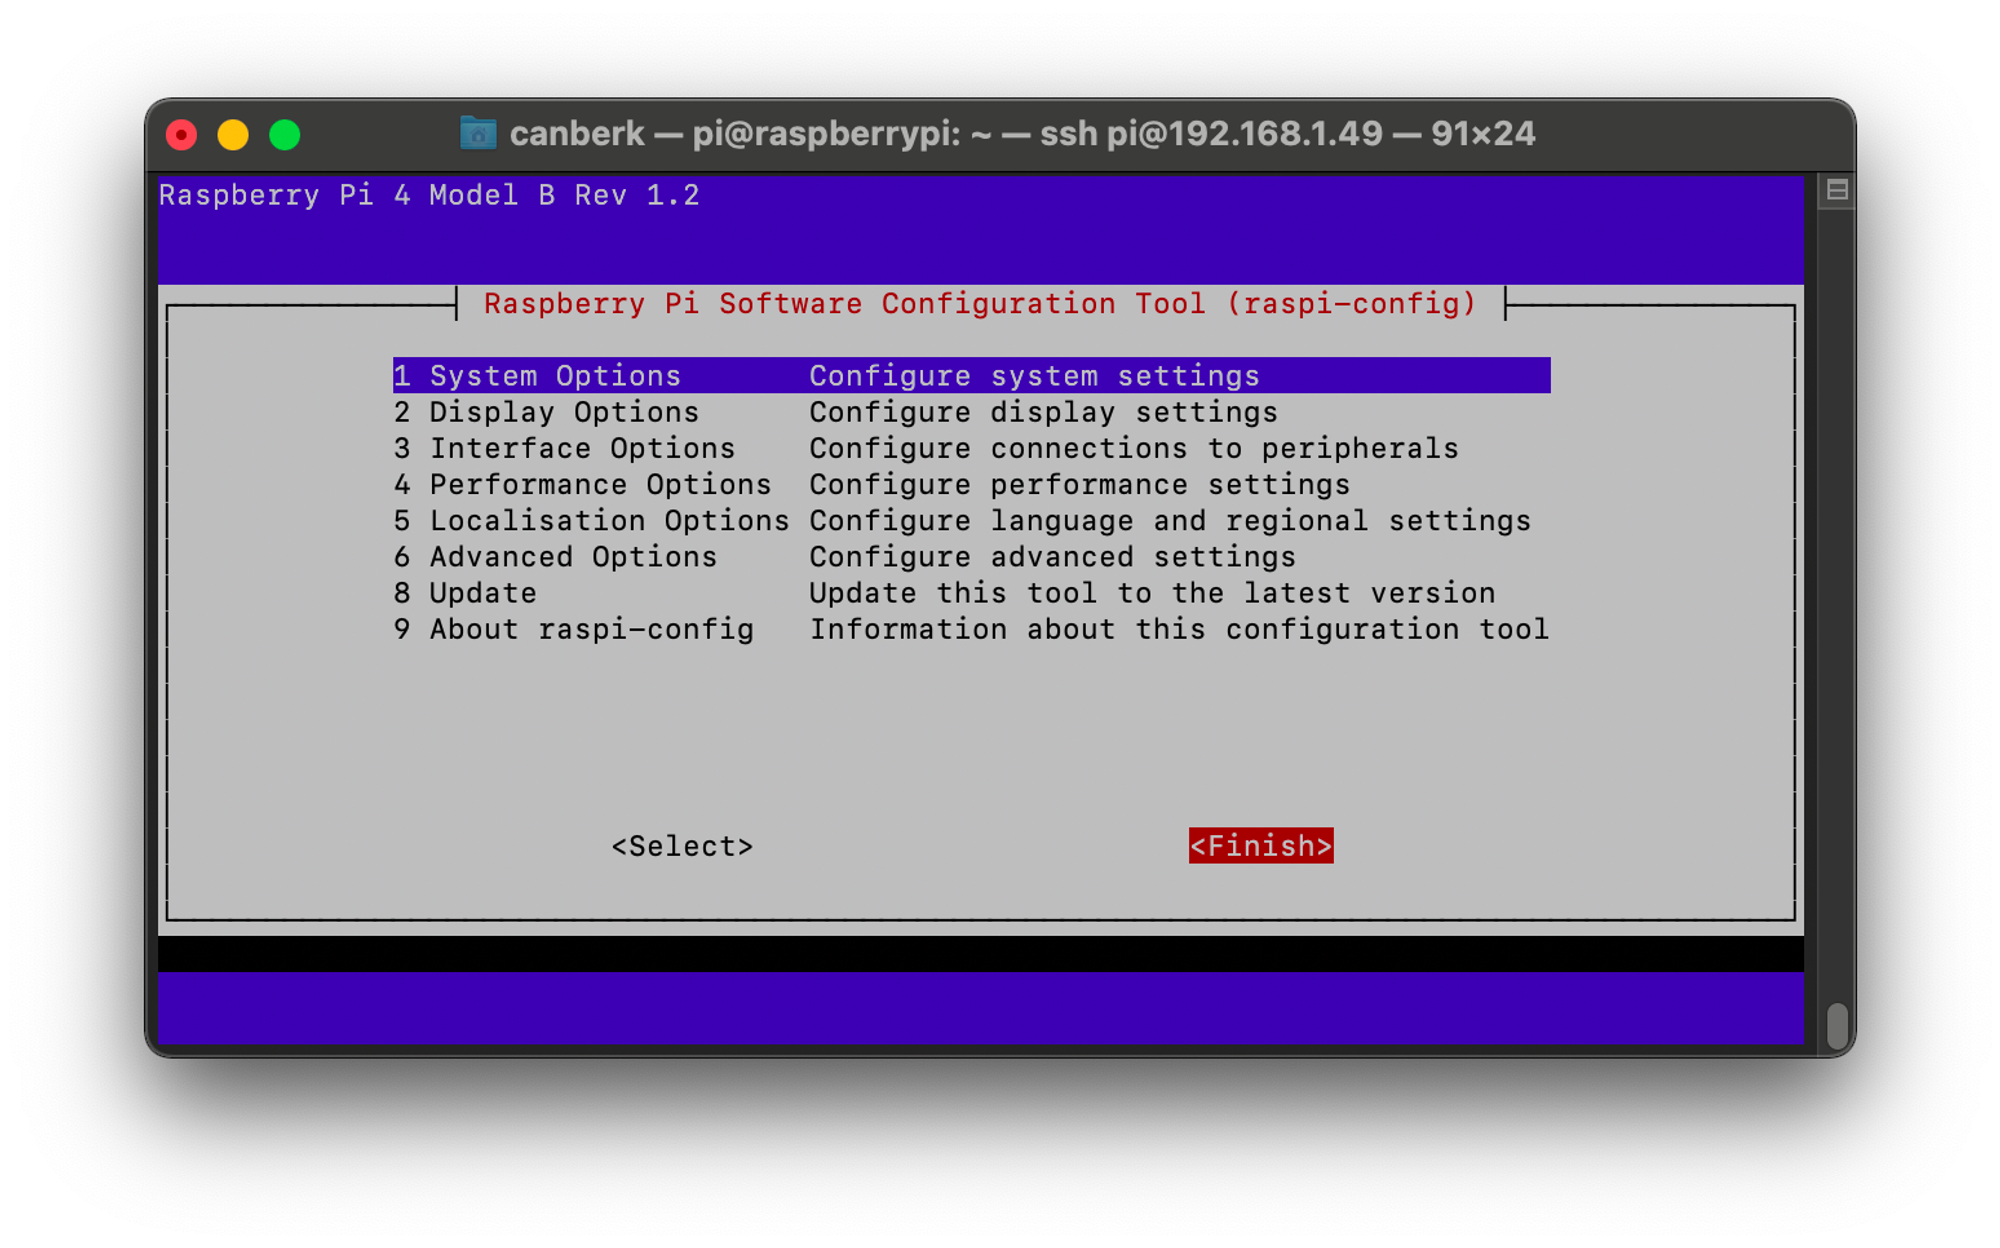
Start the Raspberry Pi Software Configuration tool with the following command:
sudo raspi-configThe tool should look like the image below. Navigate to the Interface menu with arrow keys and select by hitting enter.
Select Camera from the menu.

Confirm to enable the camera interface.
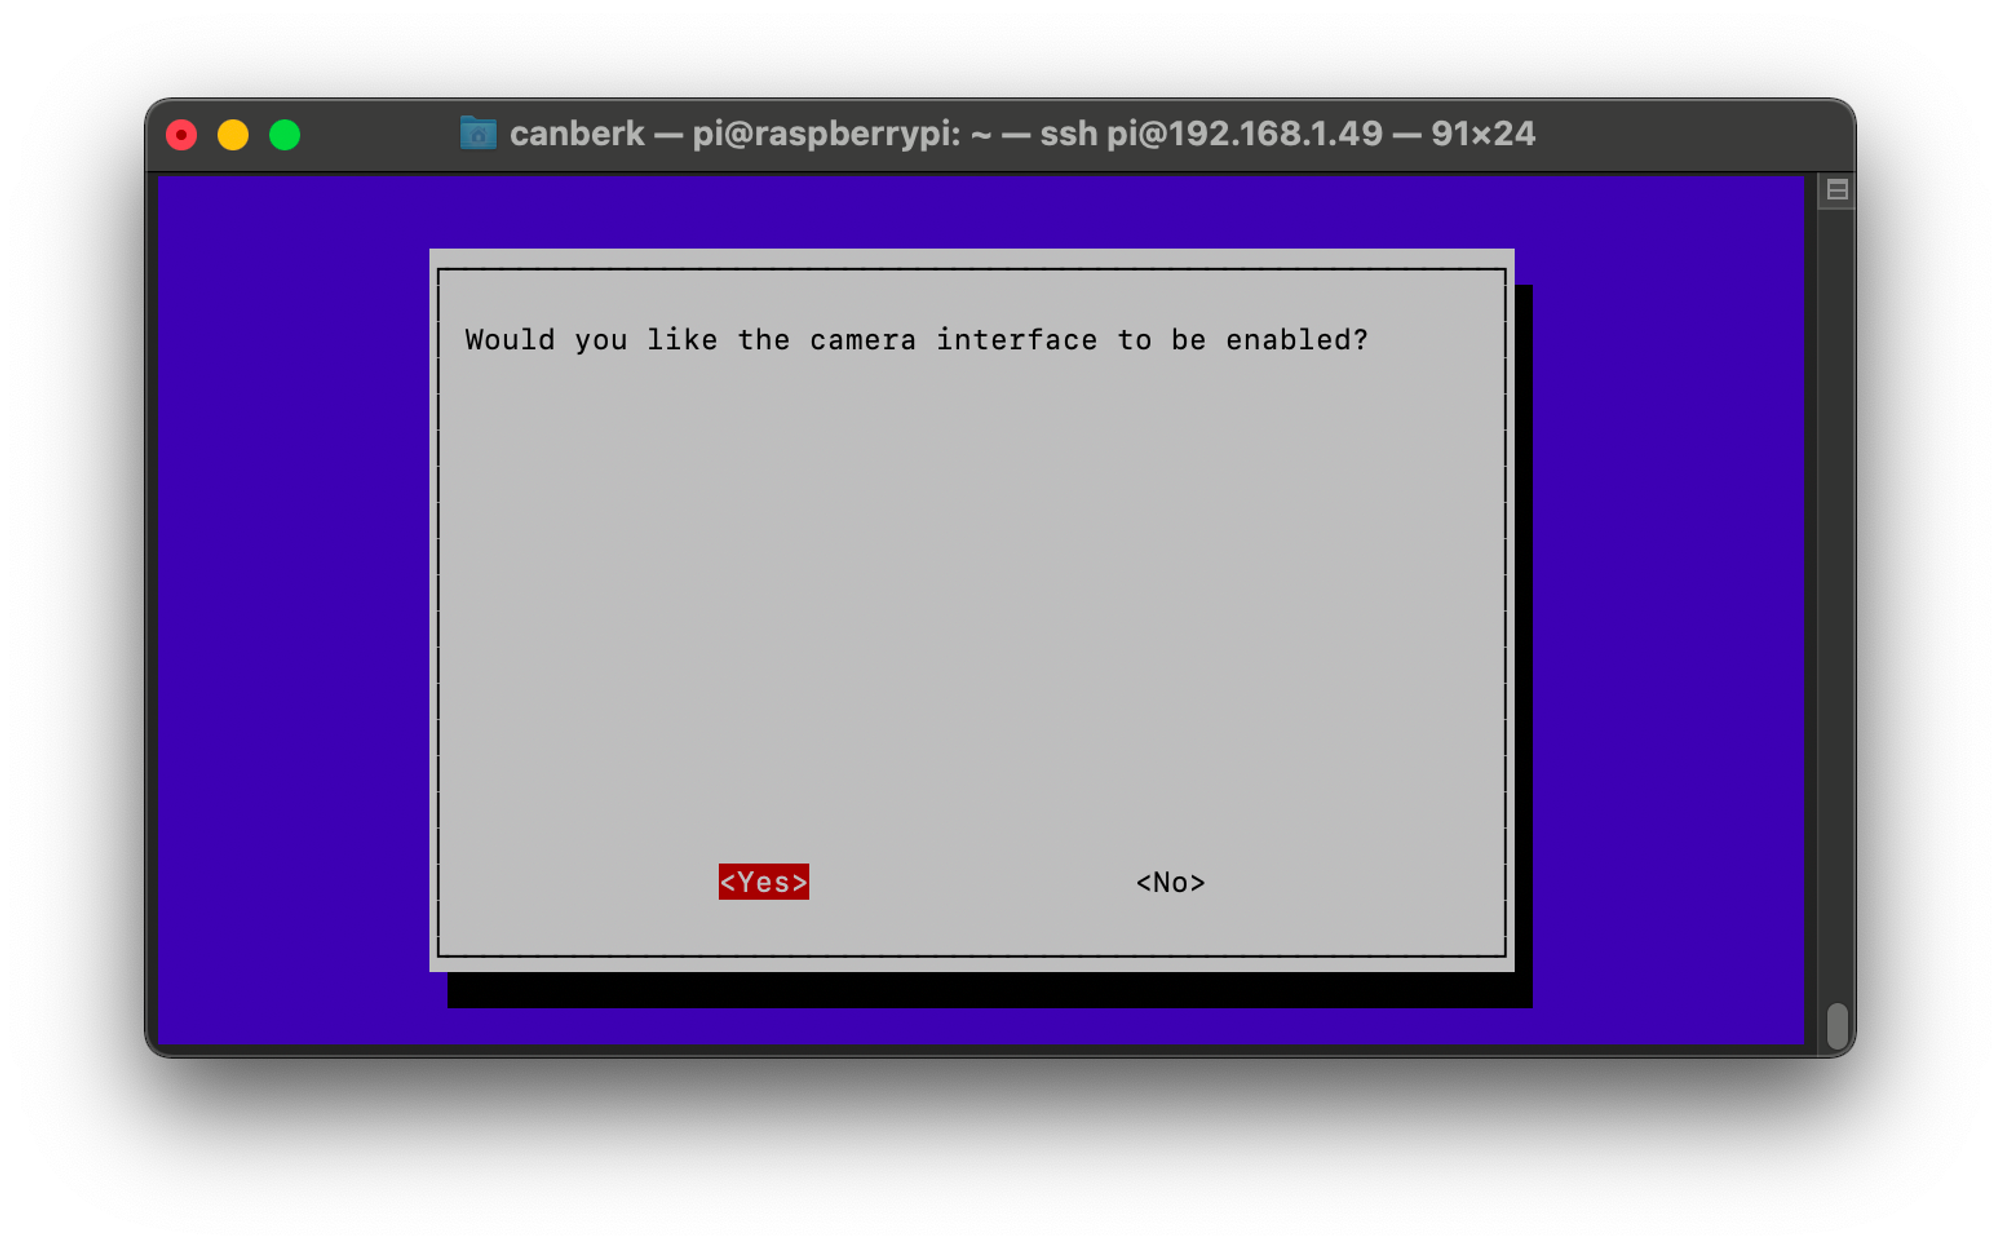
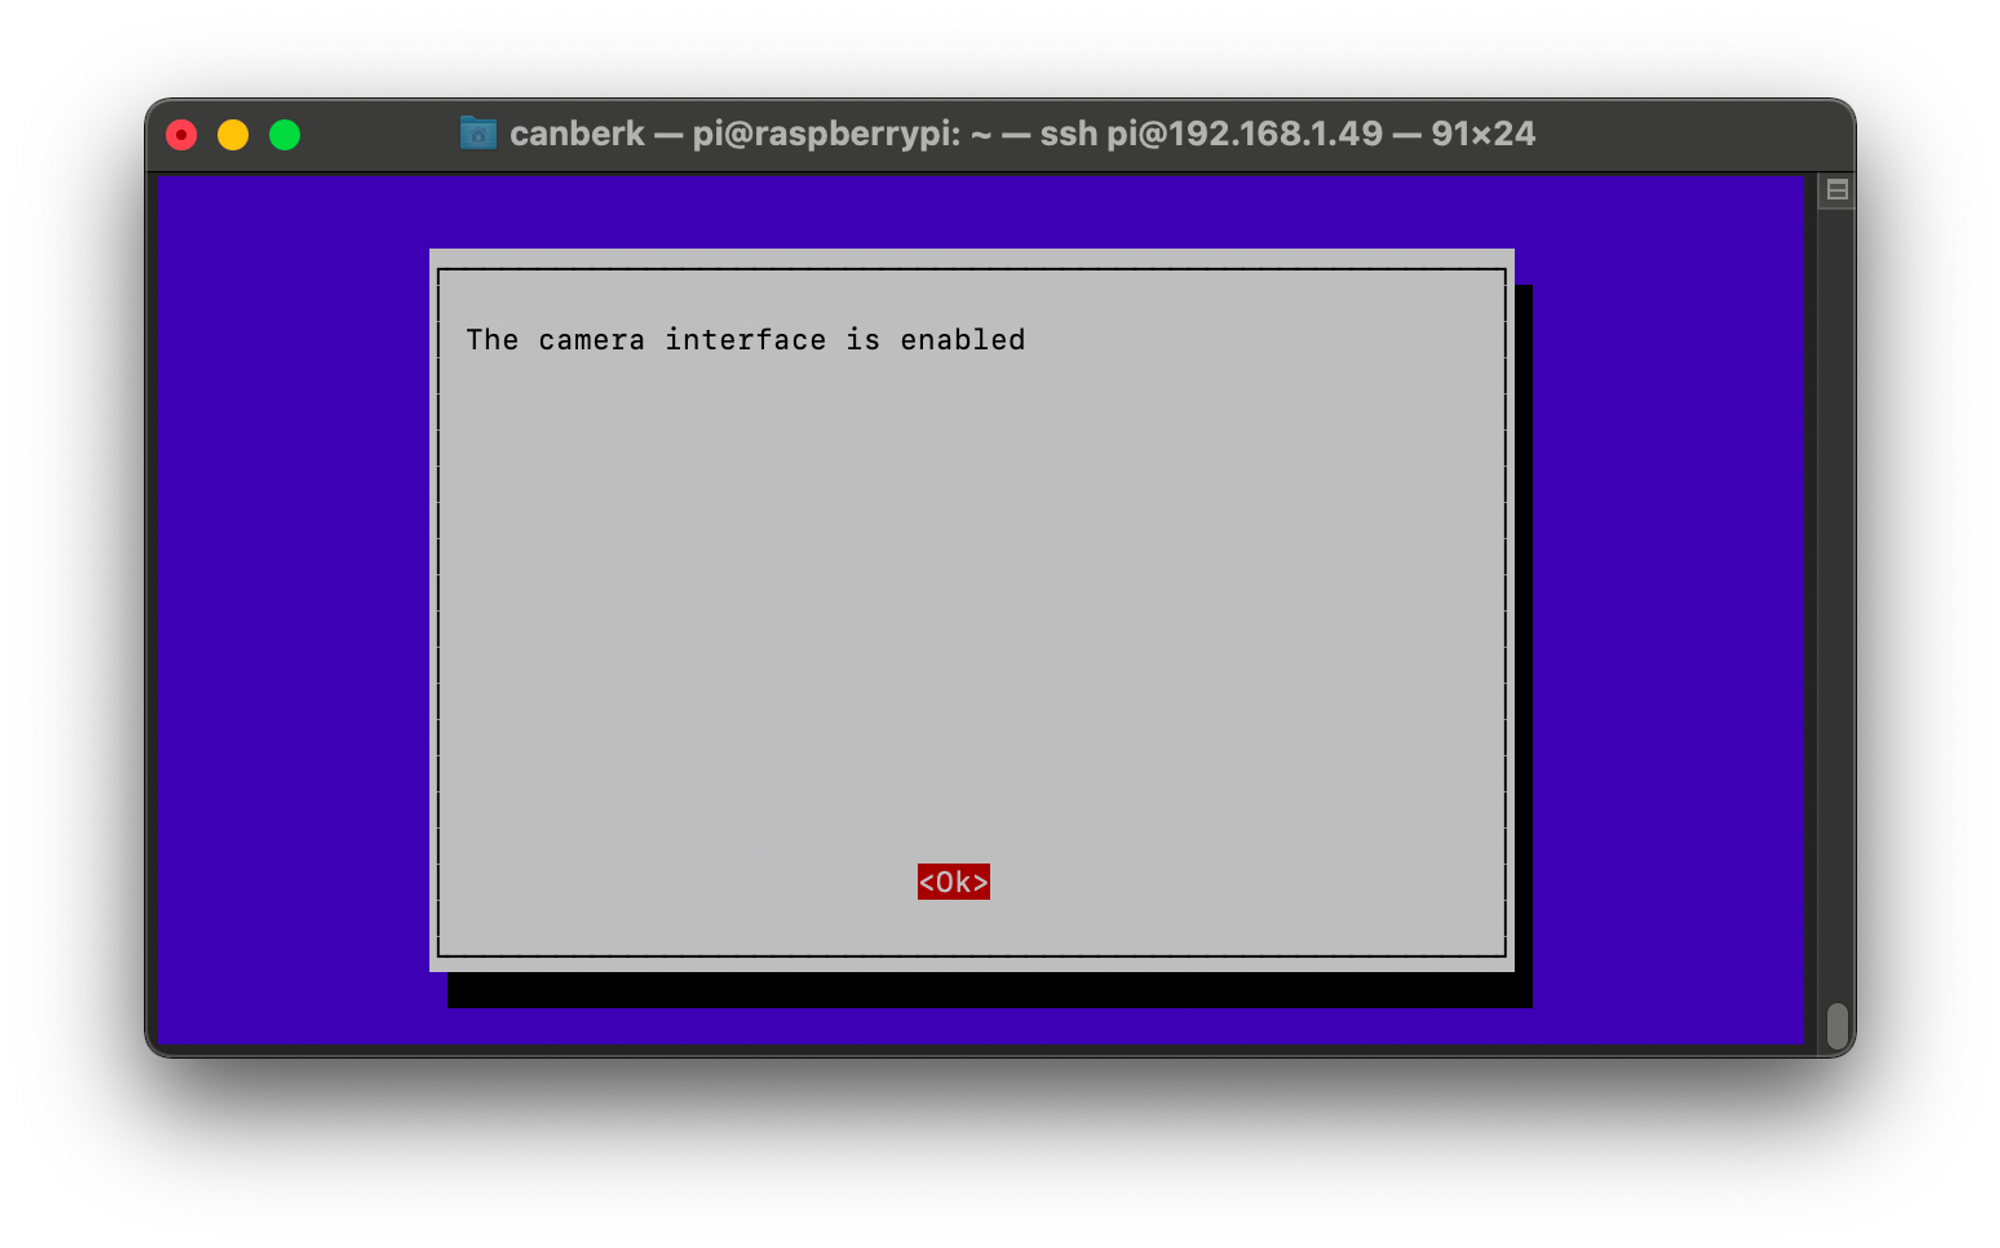
You should see a message that says ‘The camera interface is enabled’
Exit the tool by pressing the right arrow twice to select ‘Finish’
After exiting the tool you should reboot the Raspberry Pi with the following command:
sudo reboot8. Conclusion
This guide is written to make the OpenCV installation process easier for everyone. Precompiled binaries make us able to install OpenCV in a couple of minutes and get started building our projects. After this installation you will be able to use OpenCV main modules and extra modules with Python but not with C++.